Dear Reader, in this age of AI created content, please support with your goodwill someone who works harder to provide the human-made. Sign up at the top of the lefthand column or bottom of this page. You will receive my hand illustrated monthly newsletter RESTORE NATURE and access to the biodiversity garden design course as I write...and nothing else, I respect your time. I am also removing the advertizing as best I can as its become intrusive inappropriate and pays me nothing.
Biodiversity Garden Design Basics
Stage 1
your needs and givens
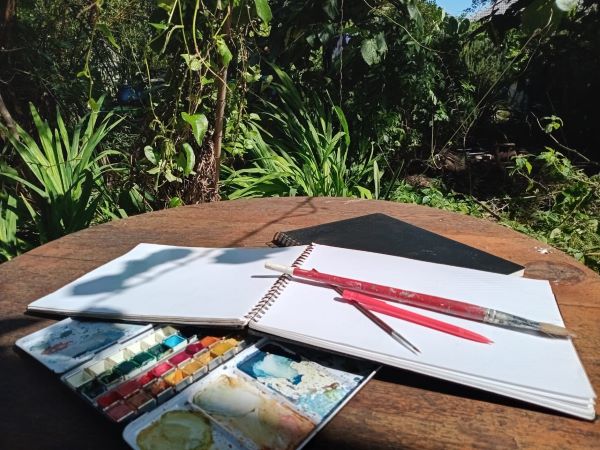 A fabulous garden design can be made with the simplest tools.
Designing and creating a garden happens in a series of steps in which you refine your original ideas, both in the planning and through time as the garden grows. I've divided the planning into four stages, mapping pre-existing givens, plotting out the things to build, acquiring plant knowledge and planning maintenance and execution. After the four planning stages you will have a much more fleshed out project and some to do lists. You can then read further on some topics like soil creation to further tweak and refine your design.
Designing a garden that is a sanctuary for biodiversity consists in solving problems and a lot of thinking in addition to physical action. The interplay between gardening and nature is infinitely complex and often unpredictable, and one wants to make the wisest moves possible, but nothing will work out quite as expected, and one must adjust over and over again, and learn to take disappointments, and focus on the wonderful surprises, because there will be many of both. Any source which makes growing plants look magically easy just propagates disappointment. On the other hand many many people do grow plants and plant food successfully, and anyone can, if they wish to.
Providing for wildlife can lead to conflicting goals. Perhaps this is why few gardens have it all, from being magazine worthy to being a real wildlife haven and producing tons of organic food. Pride yourself on your priorities, you don't have to please everyone.
 Tracing paper is useful. Here I'm developing an apparently random planting pattern for my herb garden. In the module on plants we will go deeper into planting design.
Click here to see my inspiration for naturalistic planting layouts.
Starting your biodiversity garden plan
The designing process can start in many ways. A useful method is a plan on paper. It is an aid to thinking, and getting in all the necessary elements. I've often worked without paper plans. However, If you want the garden to look designed in a formal way or for your built systems to all fit together better, and perhaps save yourself time and money, you need to spend a lot more effort on the paper planning.
A haphazard but workable natural method
The plan-as-you-go approach is the way most people would probably take on the building of a garden, going straight from plans in the head into the real world. When financially constrained one may feel pressured just to act, and not 'waste' time and thus money on too much deliberation.
The succession of work would be experiment, observe, adapt. This way of designing is not thoughtless, but involves a great deal of learning, analyzing and correcting of errors. It is a bit like crisis management. Yet the more appropriate thought put into the garden beforehand, the more errors may be avoided. But this needs to be kept within limits, because acting on nature is a greater teacher than our own reason and planning without experience, and there will always be errors.
I have worked without paper plans in a pinch, when in a great hurry to lay a garden. However in retrospect, I wish I'd put more into the design process to make it work better and provide more diversity. Over the years the legion of my mistakes has taught me better ways of doing things. Some of the most useful things to think of are knowing where the water supply will go, and planting accordingly, based on the moisture in different zones, leveraging microclimates to achieve more abundance, avoiding putting trees in positions that will shade out the garden decades later, planting monstrous and vigorous invaders in small gardens and improving work flows.
In the long run the hit and miss approach works out more expensive. The highest cost is your time. You will have more plant deaths, need to move or lose more mature plants, run out of space, as well as spend most of your time containing invasive plants and processing the biomass produced. Weigh the lost decades against a few months of planning on paper and you can see that not planning may be a false economy.
Designing your biodiversity garden on paper
I have divided the whole garden design project into four stages outlined below. This module is about Stage 1. The next modules will flesh out the other stages.
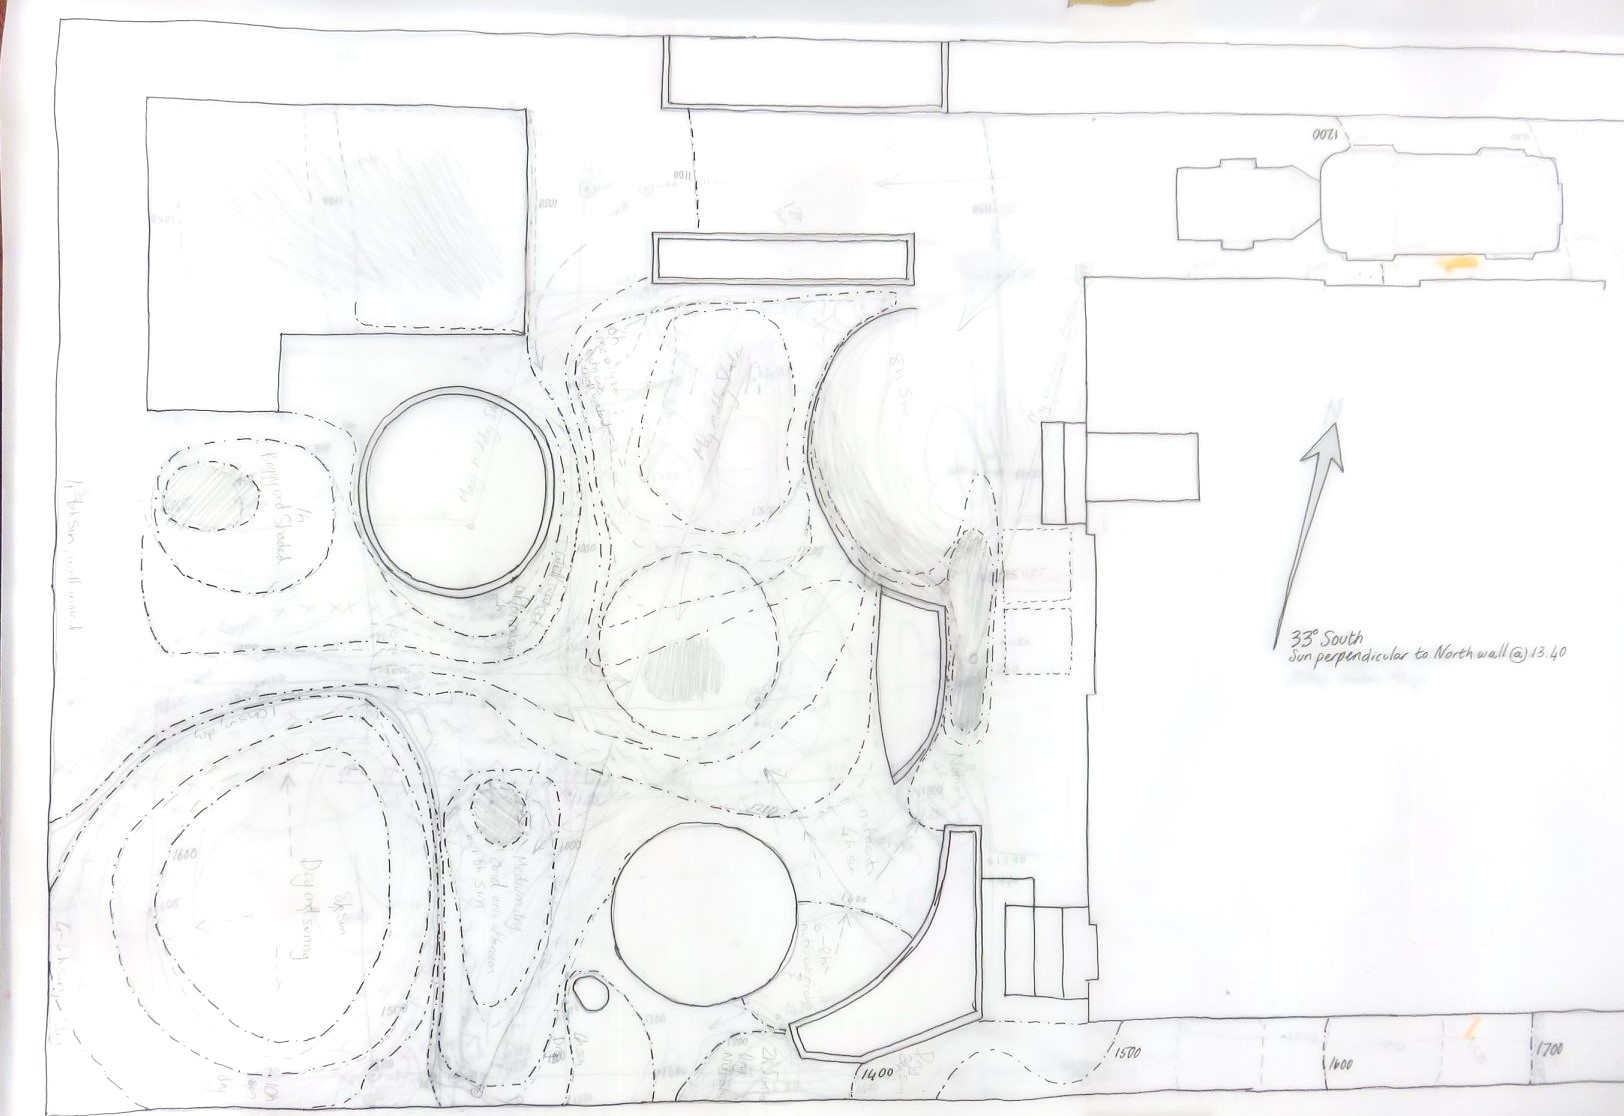 This is my base plan plotting out the garden structures and levels, using homemade measuring methods described below under 'topography'. I needed to retrofit water supply and work around garage, house, existing ponds (round) and wetlands (rectangular and sickle shaped).
The 4 stages in developing your plan
- Stage 1 Indicate or plot your pre existing givens, man made and natural. List your needs.
- Stage 2 Plot out the things to do, demarcate, build and alter. This could be your activity zones and ecosystems, structures, water lines and earth moving.
- Stage 3 Acquire plant knowledge and make a planting plan.
- Stage 4 Plan for the execution of the design and future maintenance.
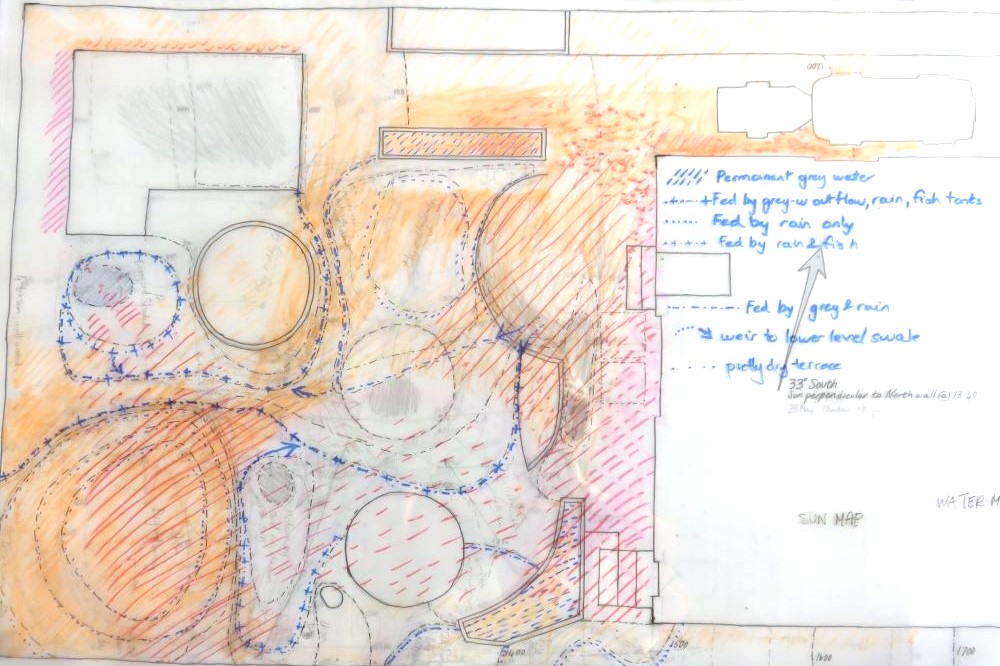 This was a tracing paper plan laid over the base plan, so it can be redone as needed. It plots gravity fed drip irrigation pipes on contour (in blue). Shade prevalence is in orange.
Now that I've explained the basic structure of this set of four modules on basic design, its time to start ! I find this such fun and I hope you will too.
Stage 1
Going into detail on your needs and givens
What needs must your biodiversity garden meet ?
No matter what kind of design process you use, even using a hired designer, it is very important to ask yourself a number of questions that clarify your goals.
- You will need to think what you want from your garden, now and in the distant future. This course caters mainly for people who want biodiversity, but diversity of purpose should also be integrated in the ideal garden space. Humans are part of this ecosystem. What other desires do you have for your garden ? What needs should be served for your animals, family and community ? Do plan for how you will enjoy the garden: eating breakfast, drinking tea, bird watching, walking, sitting, meditating and entertaining. It is easy to overlook providing comfortable space to do so. Enhancing your enjoyment of the garden will refresh your purpose when times are tough. Who uses the garden and what are their habits ? Catering for these can avoid friction and the derailing of your biodiversity agenda. Consider vegetable and fruit production, pollinator and flower gardens, fireplaces, fish keeping, humanure processing, composting, where to store water, exercise and space for dogs and children to play. If for example you want to grow food, you may need to decide to what extent you want self sufficiency, and calculate the area you will need to set aside and how to protect your crops.
- How long do you hope to live in the same place and how will you accommodate lower maintenance schedules as you age ?
- Do you have a prefered style of garden ? What does this entail ? Does it suit and how can it integrate with biodiversity gardening ? If you like your garden neat, think about how you could compromise on 'neatness'. Perhaps have some areas of highly managed and some neglected areas. Or neat frames for messy spaces, or neat focal highlights amid a chaotic background, or highly diverse hedging that is trimmed sometimes at times of year its safe for biodiversity to do so. There are many ways to do it. An 80% wild to 20% artificial and controlled relationship, or even less, makes the controlled elements stand out with greater clarity than if the whole garden is over regimented. I think it has a far more interesting effect.
- Your neighbours may have very different values and cause you misery, spraying poisons and asking you to cut down your trees because their leaves fall over the fence, blemish their cars, or God forbid, house a bird nest. Think about how to deal with them. Talk to them before planting, so that they must bear some responsibility in the negotiated planting plan and can't play an endless blame game afterwards. Best of all, convert them to the biodiversity agenda. Emphasize all the ecosystem benefits they will enjoy. Easier said than done.
 Don't forget to plan for your own enjoyment of the garden
What are your man made givens ?
- Map out the built structures on your land. Measure your plot with a tape measure and take down the measurements in a notebook. Measure its length, breadth, situation of beacons or markers, distance from buildings to boundaries, the lengths and height of the walls of buildings, the dimensons of paved areas, other structures, the length and height of boundary walls, and find out where the service lines are. You may be able to get the information on service lines from the municipality if your house design was registered with them.
- Measure the location of points of potential water supply, relative to your built structures, such as the municipal lines and where waste pipes exit the home, and gutters come from the roof. Make sure you've measured the dimensions of large hard surfaces for collecting rainwater.
- Plot these measurements on paper. You will need to decide what scale to work to. I have a small suburban property and make smallish plans from A4 to A3, but if there is a lot of detail or a large area a larger plan may be useful. To fit my plot plan on an A2 sheet I worked 1 to 100, one cm on paper to 100 on the ground. Convert your measurements on the ground to the scale on paper, and draw your plan. A large piece of graph paper can be helpful as it is already marked with units to count off the distances. You'll have to decide on a scale that suits the divisions of the graph paper.
- Are their any other man made givens acting on your property like noise, pollution or social expectations ? Consult your neighbours and city planning resources regarding the past history and future development of your land and locality. Make notes, and transfer the necessary information to the map, or key.
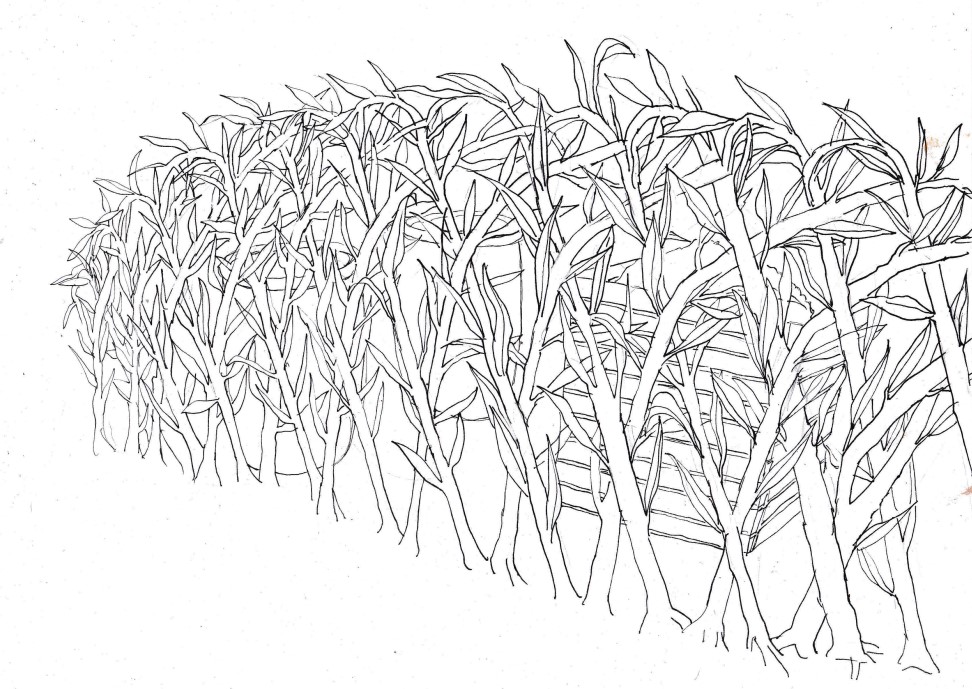 A screen camouflages unsightly objects in your or a neighbour's garden. Spot what is hidden here in this puzzle.
What are your natural givens ?
Here some measuring as well as a lot of observing is needed. Plot your natural givens on a new layer of tracing paper. While you are working on your drawing think about how the different forces operating on your land interact with each other, and what problems or solutions this presents. Look for patterns and dynamic relationships. The longer you live and actively observe on your property, the better you will understand the forces that act on it, and you can continue to evolve your strategies through the years.
Start a seasonal plant diary
It is a good time to start keeping a seasonal plant diary starting with the plants already found on your property. In future you can extend this to record when self seeded plants emerge, when you sow what, when different plants grow the fastest and when they are at their peak, when pest problems arise, when you had to change watering regimes, when your plants looked undernourished, when your fruit ripen and more. Its impossible to remember this all, and consulting generalized garden information is not as good as knowing your own site which will always perform in a unique way. Information on regional temperatures and rainfall does have its uses, especially if you have no records yet. Knowing your seasons can help you plan.
Soil
- Study your soil, either with DIY methods or laboratory testing if your budget allows. What are your soil types, and the minerals of which your soil is composed ? Assess its pH. Low cost hands on options are possible for its general nature but assessing mineral deficiencies is more tricky. You could base your knowledge on known deficiencies of your native soils in the region. An online search may give you results.
- To assess the mechanical properties of yours soil, you can dig up soil from different parts of your garden. You will need a glass jar and some borax. This article is quite thorough https://www.the-compost-gardener.com/soil-texture-testing.html and explains how to interpret the ball test, the jar test and the soil texture triangle.
- Does the soil vary across your garden with more clay rich and sandy or rocky areas ? Draw these in on your map.
- Inspect the soil's drainage. You can dig holes at various points you would like to test. Fill them with water and time how long it takes to drain away. Consult this page to learn how to interpret your measurements https://www.hgtv.com/outdoors/gardens/planting-and-maintenance/testing-soil-drainage-and-texture.
Topography
Determine the low lying and high lying areas of your plot. Depending on your situation and the lie of your land, you may need more sophisticated mapping processes. In that case please read more on surveying and mapping up survey results. You can use leveling measurement like a theodolyte or laser level for the best accuracy.
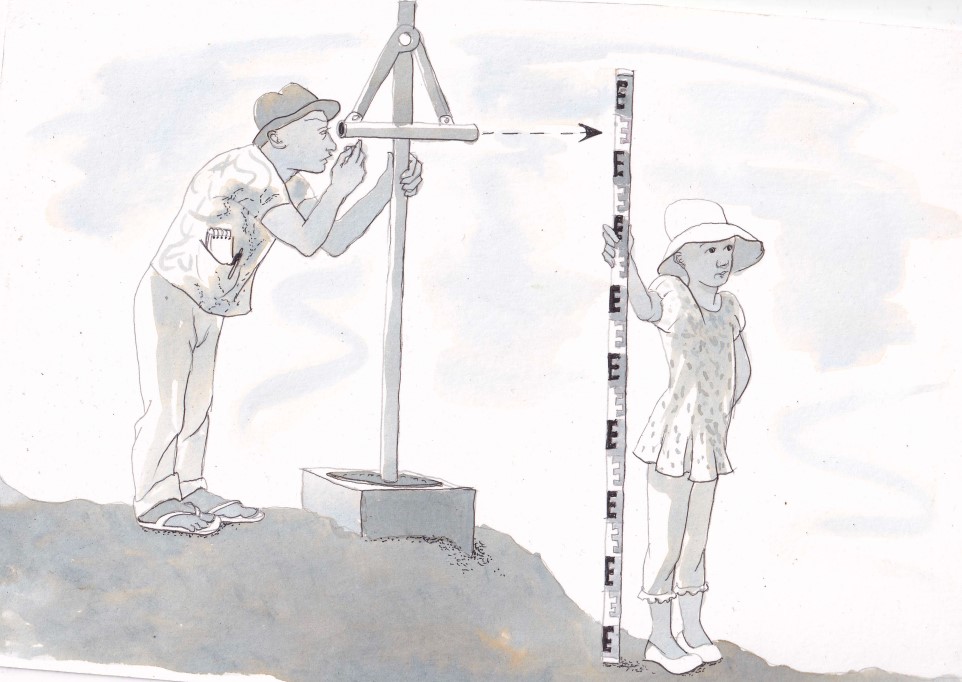 Imaginary family collaboration reading levels with a handmade hanging A frame
Some homespun methods for getting levels
- I've read of an interesting old method, the hanging A frame. Both this and the theodolyte read off height difference over big distances, and relative to one chosen point, called a datum. The hanging A frame must hang freely, by its top point, off the top of a tall stick. The bottom side should then hang perfectly horizontal. Set at eye level, you sight along it to someone else holding a staff with marks on it. I have not used it but its a nice idea, and should overcome the problems of the methods listed below, if it actually works.
- I have used the usual A frame so beloved in permaculture that walks along the ground marking out contours. I found it difficult as most ground is too uneven and rocky on a small scale for it to be accurate on a larger scale.
- I have also tried the method that is basically creating a giant carpenter's level. I tied a transparent tube several meters in length to two sticks with spikes that could go into the ground. The tube was filled with water and the sticks driven into the ground up to a certain mark, and the tube laid out over the distance where I wanted to measure differences in levels. I then measured from the ground to the water level in both ends of the tube tied to the sticks. There is a difference in the height of the water column if there is a slope. This method was soon abandoned due to inaccuracies mentioned in the previous point.
- I also tied a carpenter's level to a long straight iron L bar and laid it on the ground, leveled it by raising one end and measured that to determine the difference in levels.
- I think hiring a theodolyte would also have failed to give me accuracy on the flattish parts of the garden, over short distances, for the same reason. However it would have been useful for quantifying the drop of about 20 cm in the drive way over a distance of 20 meters, where the other implements would have been too small and led to too much error as they were put off course by uneven ground. It could also help determine the difference in levels between two spots where there are impediments, like an intervening wall, where the small range, home made measuring methods would fail.
- All these homespun methods were unsatisfactory for the same reason. The differences in level created by stone, bricks, etc. on rough ground being larger than the true slope of a flattish piece of land. Bigger slopes in the land or smoother surfaces, like a concrete driveway, would take away this problem. Although I used a datum to which all the other measurements were linked I'm not sure that I got real 'slope' readings. Over short distances where the differences created by rough surfaces are greater than the overall difference in levels, there was too much chaos, and it was hard to see where the actual surface of the soil would be if it were ideally smooth, like some Platonic plane. I couldn't flatten everything as it was a retrofit with existing beds and plantings. This means I was left in the dark as to what water would actually do on the terrain.
- All in all the most informative measure in my situation was the behaviour of water during downpours, and laying pipes to conduct water would have told me even more. This means that in my situation I could only learn from actually executing.
The interaction of topography and water
- If you can't record levels for whatever reason, watch what water does on your property. Water is very sensitive to levels and will flow down a slope that is not even discernable with the naked eye.
- Are there channels that fill when it rains, or places where water flows or pools. Are there permanently wet or permanently dry areas ?
- Which direction does the rain come from and which areas does it impact the most ?
- How far below the surface is the water table at various places on the land ?
- Does a slope outside your property affect you by allowing water to drain onto or off your property ?
Sunlight
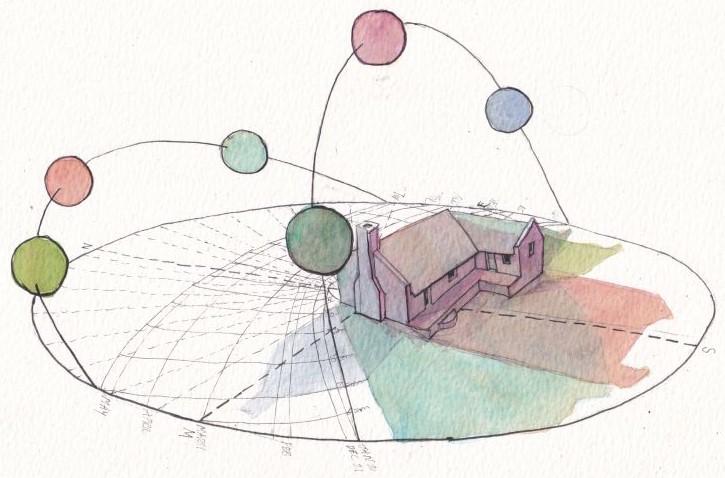 Plotting the sun path and shadows in summer and winter can involve some complex geometry. A verbal record kept through the year is just as good.
- Plot the direction of north and the sun's path. How do your slopes orient relative to the compass directions and which have more and less sun exposure ? This, the aspect, will affect planting and irrigation needs. Your walls also have an orientation relative to the sun. Which walls get sun in winter and summer and create a warm microclimate or permanent shade ? You can do a search to find out the winter and summer inclination of the sun in your area and work out how far shadows will be cast by structures.
- You can find such information by googling 'sun angle at noon' with a date and you may find a website like this one: https://geotimedate.org/sun/south-africa/western-cape/cape-town/3369157. This will give you an idea of the sun's arc at different times of year and which walls will be lit. The mapping of the length of shadows from this information as the sun moves through its arc is somewhat complex, and would require a few pages of explanation. I hope to do this in a later module if there is a demand from my readers. There are architectural apps which do it for you automatically. Otherwise observation through the year and detailed note taking is key. Back to the very useful seasonal diary.
Temperature
- You should know your overall climate zonation as this affects what plants you will choose when you delve deeper into plant knowledge in Stage 3 of the designing processs.
- However, temperature will not be uniform on your property and you can use this to your advantage. You could record temperature microclimates in the garden. These are much affected by sunlight, shade and wind. I measured temperatures in about 10 locations on my property for several days and noted large differences in day time temperatures between different spots.
- Where are the warm and cold pockets of air ? Observe what happens through the seasons in response to to sunlight's warmth. Are there surfaces that absorb and reradiate heat ?
- Does the slope and aspect of your land have effects and assess if sometimes the microclimate is affected by other elements like wind.
Wind
 50% barrier makes the best windbreak 50% barrier makes the best windbreak |
 solid barriers create turbulence solid barriers create turbulence |
- Do regional maps show you the prevailing wind direction ? Observe the dominant wind directions but also how wind is channeled on your property depending on the direction it comes from.
- Where do you have wind tunneling and turbulence ? This can be very different depending on roof shapes and wall height and other obstacles and channelers of wind like hills, valleys, trees and so on.
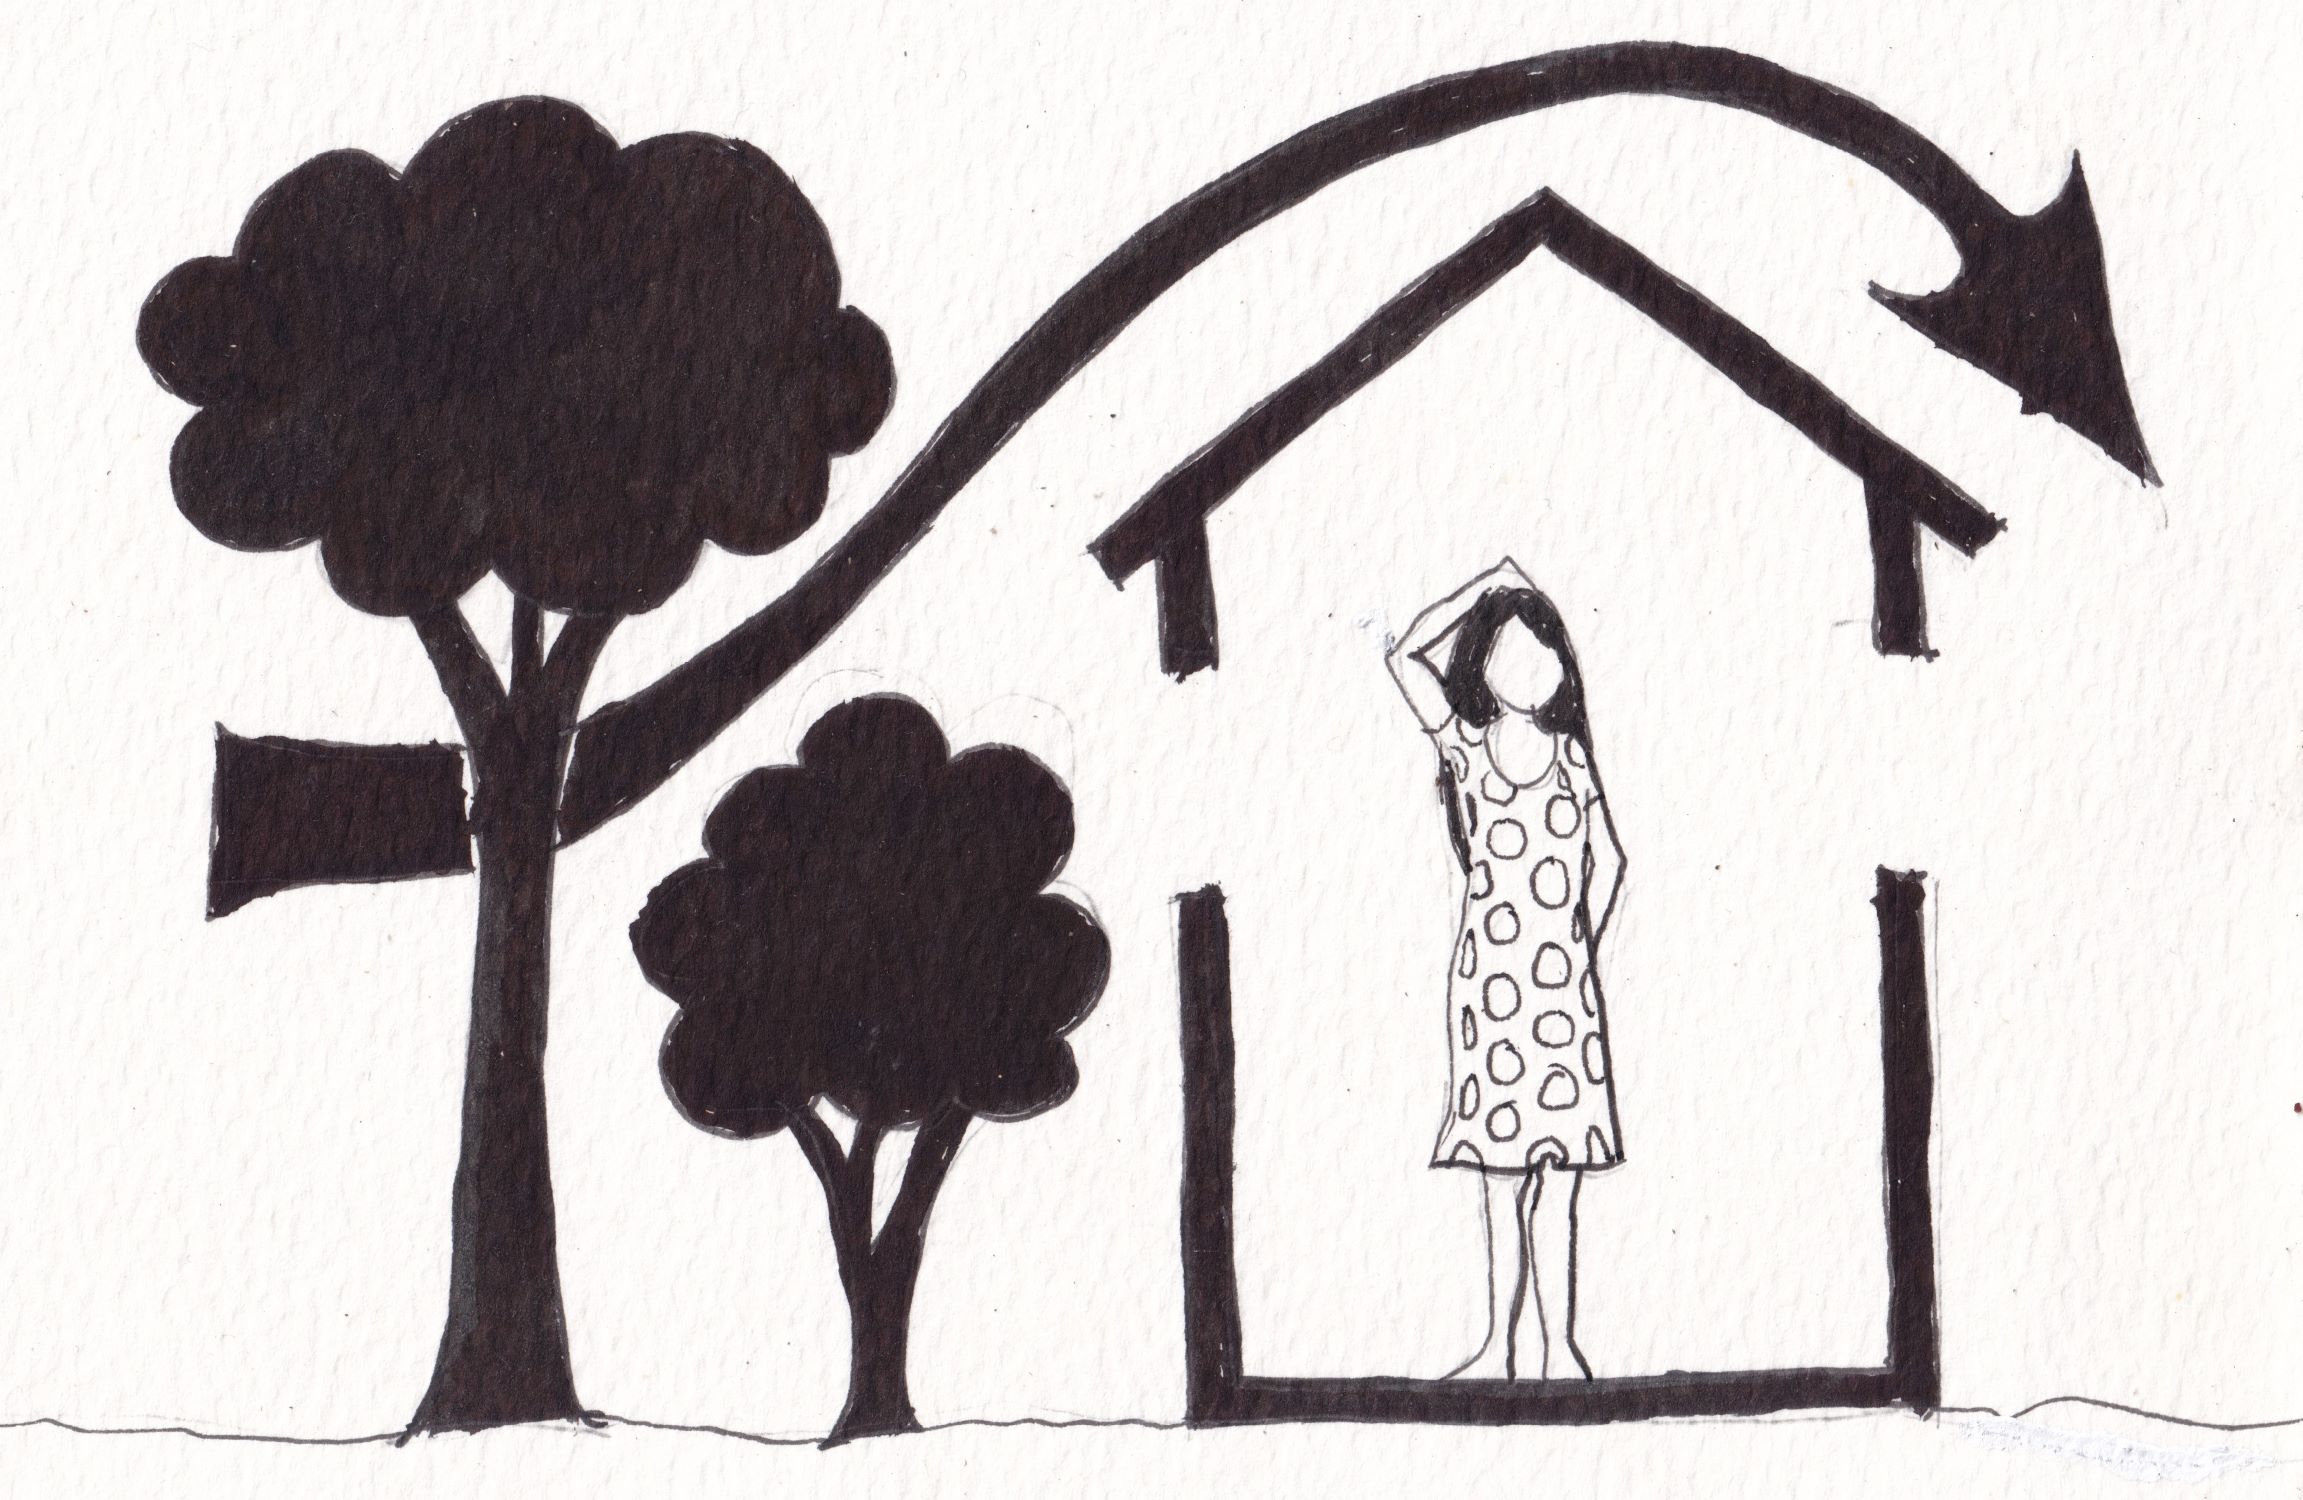 position of trees blocks wind position of trees blocks wind |
 position of trees allows breeze position of trees allows breeze |
Existing plants
Existing plants can be one of the most useful sources of information on your land and how it functions, so read and pay close attention to them.
- Assess your native, exotic, invasive and weedy vegetation. What growth form does it take such as canopy scrub or ground cover ? What species are growing there and what happens to them through the seasons ?
- Think about how this vegetation is responding to conditions on your site like dryness, bogginess, wind, snow, sunlight and pollution.
- Take a good look at what herbaceous weeds are growing and make notes of type and where they grow as they can indicate soil fertility, or lack of it. Assess if they are they healthy looking or suffering from possible deficiencies.
- Consider whether some of your naturally occurring plants are indicators. You will have to research this for your own area.
- Do some of the unwanted plants give clues that other desired plants which are in the same plant group could thrive there ? For example my hand raised native wild asparagus grows best where the common asparagus fern Asparagus plumosus grows, which I can slowly suppress.
- Assess whether any of your weeds are nutrient accumulators or soil builders, good subjects for fermentated fertilizers, host plants for butterfly larvae, medicines or food.
- Do any plants you like thrive in the neighbourhood ? What have your neighbours had success with ?
- Look for signs of herbivory so that you can plan around it.
- How could the existing vegetation be incorporated in a biodiversity enhancing garden plan ? Do the invasives need to be removed immediately or could they act as nurse trees for others and be removed gradually ? Can they be used for crafts, fencing, compost, mulch or firewood ?
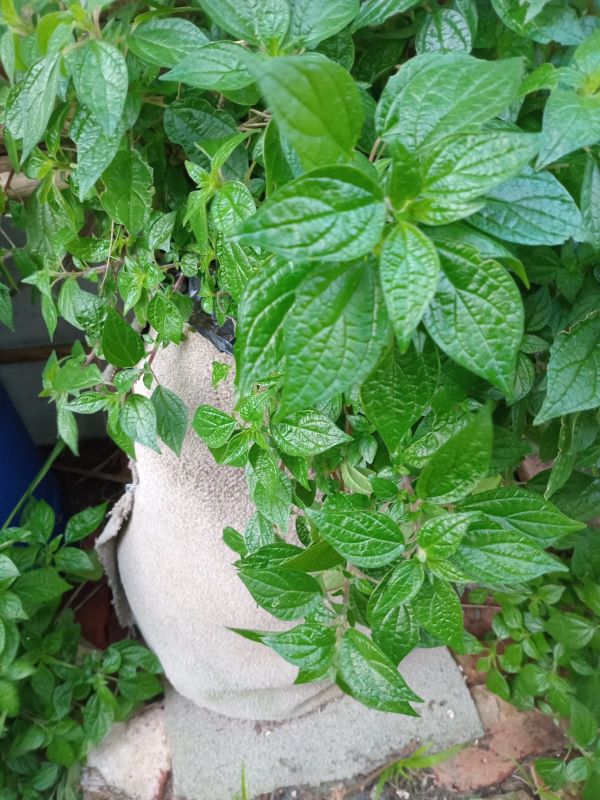 In this grow bag my peskiest weed thrives. Its brittle stems are hard to pull out, but the roots I've seen are covered with soil aggregates. It must be building soil. Not so bad after all. Unlike my other weeds, it has never taken root in my mother's forest garden which has fantastic soil and underground water. What is it telling me ?
Animals
- Observe animal interactions on your land. Where do they traverse it, nest and feed ? Later you can plan how you will support them and disturb them the least.
- Are there signs of plant damage ? Are there signs of digging ? You may need protective measures like fencing, netting and other strategies to live with the animals in your garden, and in the worst case scenario, to adjust your expectations, for the sake of upholding biodiversity.
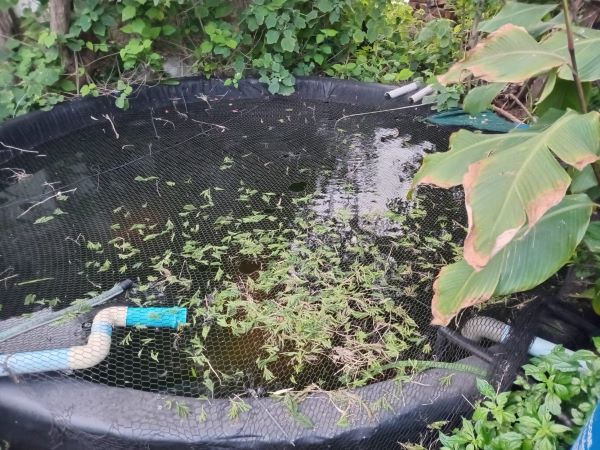 Masked weavers strip leaves off all branches close to their nests leaving this debris. We net the ponds as too much organic waste is not healthy for koi fish.
Other factors
- Most of these are already mentioned under man made givens. Observe intrusions from the man made environment on your garden. Plot factors that influence your garden such as shade from neighbourhood buildings or trees, pollution sources and street noise, as well as eyesores.
- Mark on the map the boundaries with tree unfriendly neighbours so that you can design a bit of space around the boundary and get them off your back.
- Also include things you welcome from inside and outside your property, such as a neighbour's beehive or the direction of beautiful views along your garden itself, or views of trees in your neighbours gardens, or views of the countryside from your garden, so that you can make the most of these with 'lines of sight'.
In conclusion
I hope my questions have been useful to you, allowed you to clarify your goals for the garden and prompted a deep assessment of the given conditions on your land. This may just have stimulated a lot of problem solving ideas. I hope you've been able to make a good base plan of your givens. You can make several copies of this, and preferably leave it unmarked by later planning stages, by using tracing paper layers, so that you can redo the upper layers easily without destroying your base plan.
In the next stage of the four stage design process we will get to laying out plans on paper of the things you will do. This will be demarcating areas devoted to different functions, the shaping of the land and soil and the structures you would like to build.
The biodiversity gardening course (access to be given later)
Restore Nature Newsletter
I've been writing for four years now and I would love to hear from you
Please let me know if you have any questions, comments or stories to share on gardening, permaculture, regenerative agriculture, food forests, natural gardening, do nothing gardening, observations about pests and diseases, foraging, dealing with and using weeds constructively, composting and going offgrid.
Your second block of text...
SEARCH
Order the Kindle E-book for the SPECIAL PRICE of only
Prices valid till 30.09.2023
Recent Articles
-
garden for life is a blog about saving the earth one garden at a time
Apr 18, 25 01:18 PM
The garden for life blog has short articles on gardening for biodiversity with native plants and regenerating soil for climate amelioration and nutritious food -
Cape Flats Sand Fynbos, Cape Town's most endangered native vegetation!
Apr 18, 25 10:36 AM
Cape Flats Sand Fynbos, a vegetation type found in the super diverse Cape Fynbos region is threatened by Cape Town's urban development and invasive alien plants -
Geography Research Task
Jan 31, 25 11:37 PM
To whom it may concern My name is Tanyaradzwa Madziwa and I am a matric student at Springfield Convent School. As part of our geography syllabus for this
"How to start a profitable worm business on a shoestring budget
Order a printed copy from "Amazon" at the SPECIAL PRICE of only
or a digital version from the "Kindle" store at the SPECIAL PRICE of only
Prices valid till 30.09.2023
