Dear Reader, in this age of AI created content, please support with your goodwill someone who works harder to provide the human-made. Sign up at the top of the lefthand column or bottom of this page. You will receive my hand illustrated monthly newsletter RESTORE NATURE and access to the biodiversity garden design course as I write...and nothing else, I respect your time. I am also removing the advertizing as best I can as its become intrusive inappropriate and pays me nothing.
the basics on how to grow your own plants from cuttings
gardening tips for taking cuttings to grow your own plants
4 general basics
ensure saturated humidity
ensure moderate temperature
scar below a node at bottom of cutting
remove most leaves
The implementing of these points in practice takes many forms. Often different types of plants will have different needs. Different types of plants will be more or less prone to rooting.
These notes are generalized from my experience, discussion of different types of plants and how to take their cuttings will be backed up with research, later, but designed to suit the home gardener, to grow your own plants on a small scale.
ensure saturated humidity
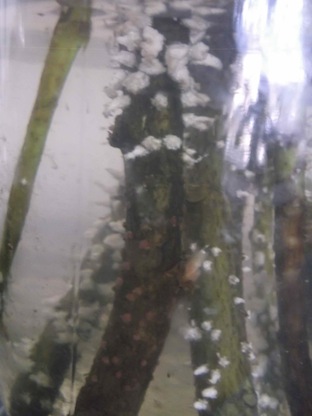
The budding roots of a pretty frilly hibiscus
You can ensure supply of water to the plants is high by letting the cuttings root in a container of water, or by growing the cuttings under plastic or glass, or with regular spraying, for air which has 100% possible moisture.
IN A JAR OF WATER
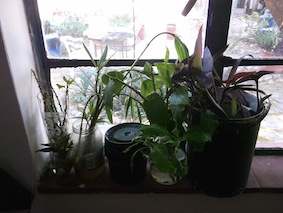
Many plants do not root, but rot (like olives), when standing in water. The container can be transparent or dark. I believe dark is better for some plants, encouraging the roots to grow, but the leaves should get light. The kitchen windowsill became too hot so I moved them to a room with a shaded widow. Once root growth starts it seems to spread to the other cuttings in the container (a hormone exchanged through the water perhaps). I’ve had success with bizzy lizzies (quick), moonflowers (amazing ! but slow), some cultivars of hibiscus (amazing, but slow, the tiny red bells and the big frilly double ones. Still trying with the large simple kind, which have gnarly barked twigs….experimenting with removing more leaves, which always seem to desiccate) I’m beginning to think the cutting likes it slightly warmer than the temperature at which the mother plant gets by. Plants that can grow in snow need a little spring warmth, bizzie lizzies like a sunnier windowsill, and so on. If the water in the container is getting too warm move them, its not an accurate science yet in my mind.
UNDER TRANSPARENT SHEETS, OR COVERS
This includes growing in a hothouse, plastic tunnel, or in a plastic bag or under a cut off juice bottle, or a glass pane placed over a box on your windowsill. Make it (almost) airtight, as this insures the even moisture and the saturated humidity under the sheet. Monitor the dampness of the soil constantly. This is how I do most of the cuttings that will not respond to the jar of water treatment. Plastic sheeting is the gardener's secret weapon, and one of the most beneficial low cost gardening tips. It helps with rooting cuttings, germinating seeds and growing plants in cold weather, without a greenhouse.
SPRAYING
This has to be done so frequently (every ten minutes or so) to maintain a constant humidity, that it works best with an irrigation system, used inside a greenhouse, which is getting out of the league of all but the most ambitious or fortunate hobby gardener. Cheap irrigation systems with timers are available at garden supply stores.
ensure moderate temperature
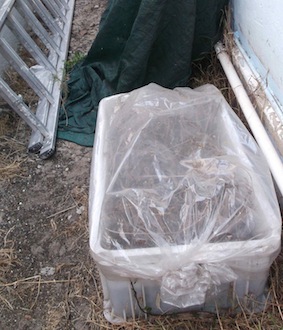
olive cuttings in their 'greenhouse'
GREENHOUSES are intended to harvest solar energy and convert it to warmth, and thus maintain a moderate to warm temperature for propagating by cutting or seed, in addition to being able to conserve air humidity. In a hot climate, where the sunshine is not moderate, some kind of SHADING is needed for the cuttings. Our greenhouses are lightly shaded, and shade cloth is sold at most nurseries. Warming in winter with heaters is an optional expense for plants that are probably exotics from the tropics. On a very small scale, CLEAR PLASTIC BAGS over pots will make them warmer, if stood in the sun, or on a windowsill, and it just depends on your climate as to whether this is overkill or desirable. In the Cape winter, some small scale horticulturists will use A HEATING BLANKET for a home aquarium, covered with a damp towel to spread heat and stop it burning, on which the plants are placed. This is good for tropical fruit like grenadillas.
remove most leaves
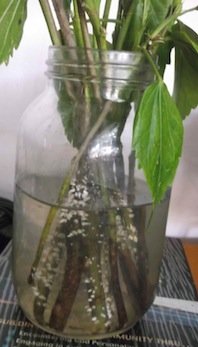
each cutting only had four small leaves. they grow as the roots grow.
The first thing to do is remove most of the leaves. They photosynthesize, feeding the cutting, which is good, but they also lose too much water. My trick is to remove all but about four. And if these wilt, remove two more. Sometimes I have to start again with fresh cuttings if they wilt, because the wilting seems to kill them. The quantity of leaf removal should vary for the type of plant and when you grow your own plants from cuttings regularly, you will develop a feel for it. It is even different between cultivars of the same species. You have to experiment.
scar below a node at the bottom of cutting
Take a knife and slightly notch the cutting below the bottom most node (bump on stem where leaves arise). The amount of scarring and the way you do this also varies with plant types, so you can experiment, or read up about propagating your desired plant, but I find that books and so forth, tend not to help if something is really not working. I struggle with olives, but will not give up.
growth medium in the pot
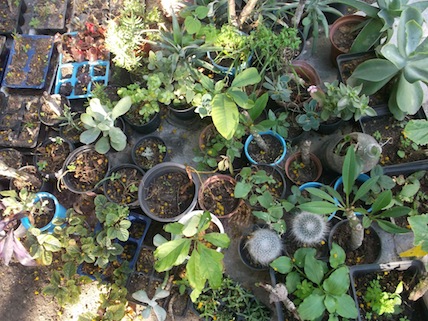
grow your own everything: my nursery grown mostly from cuttings
Some plants will be rooting in water as discussed. When transferring a plant from the water jar to soil, it must adjust and is vulnerable. I’ve lost many until I ensured that the soil was really wet at first for a week or so. Most plants prefer to root in soil. Some like sand or a richer medium like vermicompost. The whole pot and the plant must be inside the sheeting you’ve chosen to ensure humidity for the cutting. They do often get mouldy if they sit for a long time, it is unfortunate. This happened a lot in Germany in winter. I think they were warm and moist enough but had too little light, as my balcony prevented sunshine from reaching them. The UV light in sunshine kills a lot of pathogens, an stimulates leaf growth.
How long to wait, if nothing 'happens'
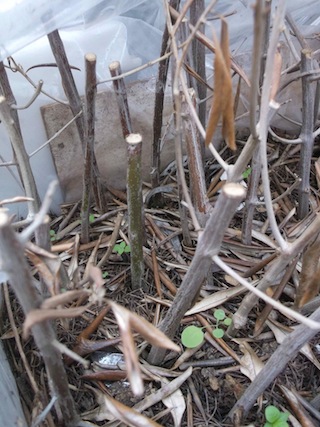
my poor olives: one green stick amongst the brown
If you want to grow your own plants from cuttings you will find some plants root fast in weeks like bizzie lizzies, others are slow and difficult. Moonflowers take about two months to be ready for planting, so do Hibiscus. Olives are said to take three months, I wouldn’t know, really, its just hearsay ! I'm 6 weeks in. If a plant's leaves wither but the stem stays the same, one cannot be sure it is not going to root. Some can appear ‘dead’ for a year, like Franjipanis and grape vines. However, if the stem shrivels up, or the leaves rot or get mouldy, it is not likely to take. If this happens to them all, you know it’s a difficult plant to root and its time to resort to plan B and use more tight growing conditions and root hormones like Ceradix. I don’t use them because I rely on quantity, (twenty cuttings at a time) and losing most of my cuttings. I also pour a little water from successfully rooting plants in the jar, onto other plants, hoping the hormones will be in the water and encourage rooting, but there is the risk that plant poisons are also in the water, in which case you will help the plant war effort rather than symbiosis. You also can start off with Ceradix etc. in the beginning if you want a high rate of rooting, and to grow your own cuttings more easily, or cannot afford the time for failure in slow growing plants, with cold seasons in your area. I will definitely use root hormones and better technology with next year’s olive cuttings. What a triumph, to grow your own olive trees.
---------
green home page links to useful gardening and resource conservation
----------
------
vegetable gardening the natural low cost way
----------
----------
more specific gardener's equipment needed for difficult cuttings
----------
grow your own veggies the easy way
-----------
grow your own veggies and flowers with worm tea
Restore Nature Newsletter
I've been writing for four years now and I would love to hear from you
Please let me know if you have any questions, comments or stories to share on gardening, permaculture, regenerative agriculture, food forests, natural gardening, do nothing gardening, observations about pests and diseases, foraging, dealing with and using weeds constructively, composting and going offgrid.
SEARCH
Order the Kindle E-book for the SPECIAL PRICE of only
Prices valid till 30.09.2023
Recent Articles
-
garden for life is a blog about saving the earth one garden at a time
Apr 18, 25 01:18 PM
The garden for life blog has short articles on gardening for biodiversity with native plants and regenerating soil for climate amelioration and nutritious food -
Cape Flats Sand Fynbos, Cape Town's most endangered native vegetation!
Apr 18, 25 10:36 AM
Cape Flats Sand Fynbos, a vegetation type found in the super diverse Cape Fynbos region is threatened by Cape Town's urban development and invasive alien plants -
Geography Research Task
Jan 31, 25 11:37 PM
To whom it may concern My name is Tanyaradzwa Madziwa and I am a matric student at Springfield Convent School. As part of our geography syllabus for this
"How to start a profitable worm business on a shoestring budget
Order a printed copy from "Amazon" at the SPECIAL PRICE of only
or a digital version from the "Kindle" store at the SPECIAL PRICE of only
Prices valid till 30.09.2023
