Dear Reader, in this age of AI created content, please support with your goodwill someone who works harder to provide the human-made. Sign up at the top of the lefthand column or bottom of this page. You will receive my hand illustrated monthly newsletter RESTORE NATURE and access to the biodiversity garden design course as I write...and nothing else, I respect your time. I am also removing the advertizing as best I can as its become intrusive inappropriate and pays me nothing.
how to grow plants and design small permaculture plant nurseries
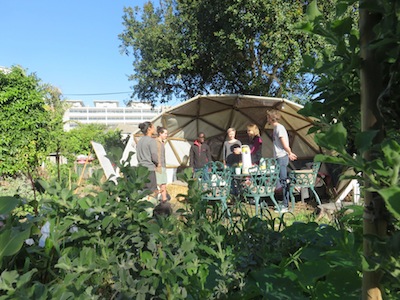 learn how to grow green in the city at Guerilla House
Small plant nurseries and the
Guerilla House
propagation workshop
Small plant nurseries are the foundation of permaculture. I learned about designing them and how to grow plants for my own nursery when I attended a propagation workshop in the heart of the city on the weekend.
It was wonderful to be with such a group of beautiful people and as usual everything was superbly well organized. Guerilla house has two venues which are easily accessible from vast areas of the Cape Town metropole, this one was in Claremont. You can contact them at info@guerillahouse.org or find their page on facebook which outlines the workshop program.
Imraan and Josh host workshops which are models of good structure and planning. We opened with games to help us all relax together, and proceeded to basic rules of engagement outlined by Imraan, and then placed propagation in a permaculture design framework.
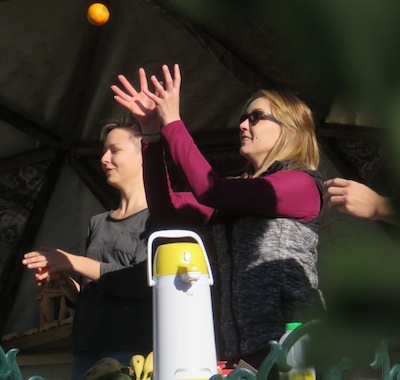
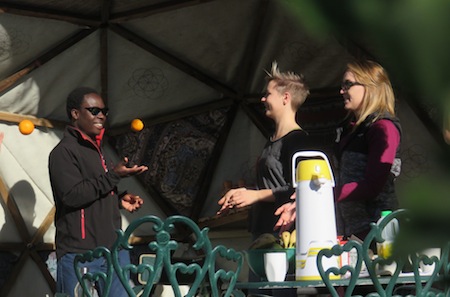 This group juggling is a metaphor for interactions within permaculture design
Why the need for small permaculture plant nurseries ?
Locally adapted plant stock is very limited. We need to be able to propagate for diversity and resilience. Commercial nurseries supply a wide range of plants, but not ecosystem knowledge and this is where permaculture and attending workshops like these comes in.
 Imraan explains the value of mutual respect in social exchanges within permaculture
Guerilla House and other permaculture workshops
Here, at these workshops, is where we learn to make low maintenance food gardens and even design plant nurseries by modeling the garden on the way nature functions in cycles. With some thought it is possible to recycle everything, each design element supporting many others, and so forth.
Applying permaculture design to designing plant nurseries
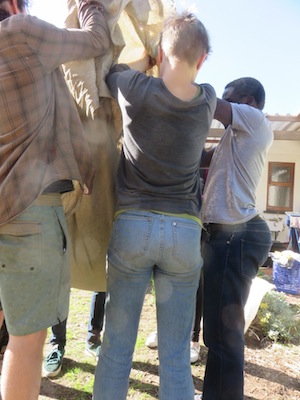 Rolling and thus mixing the propagation media in a tarp is another example of productive interaction
When designing plant nurseries, its important to look at the inputs to propagation, and the outputs from it, as well as its internal characteristics. The point is to find ways of putting all the elements of the nursery to better use, using them more than once, making everything work harder for you, and optimizing your energy input.
Some examples of this type of functional integration follow. Plant nurseries attached to the house can buffer sound, temperature and humidity in your home, as well as increase insect diversity in your garden. As 95% of insects are your friends, this is a very good thing. I find it can use up a lot of your throwaway plastic such as bottles and tough bags as containers. Commercial plant nurseries discard their propagation trays which can be picked up and reused many times by small growers. Your kitchen waste can be composted to create soil for propagation in the nursery. It can also feed chickens which provide a strong garden fertilizer and eggs for the kitchen. Its a kind of poetry of function. Short, sharp and polysemic.
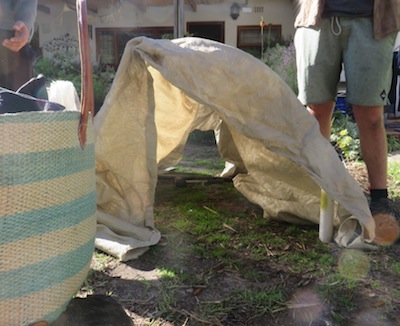 simple easy shade tunnel under construction
Plant nurseries also represent value in terms of the potential price of the plants. Josh and Imraan illustrated this dramatically when they showed us how to build a 1m square shade tunnel, using low tech methods anyone can apply, and 40-50% shade net. They explained that one can grow over two thousand plants in this small space. At a sale value of a few rands each at this size it represents thousands of rands. So a nursery is really worthwhile in the long view, for value creation and the environment.
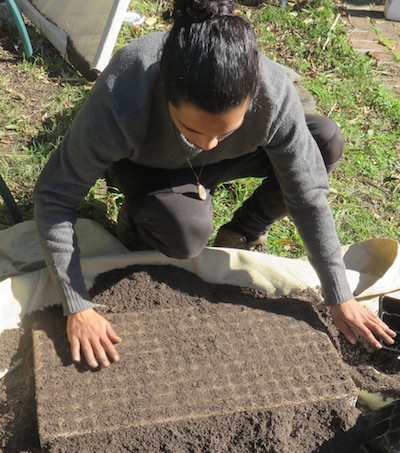
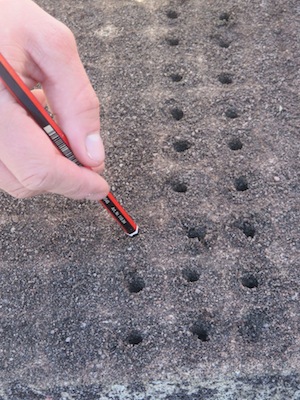 preparing the holes for propagating plants by seed
Plant nurseries in the home garden can develop step by step. Integrate functions as you go. Transplant plants as they grow, moving seedlings from seed trays when they reach the four leaf stage, and forking them gently out of six packs when they are a bit larger, and transplanting them into bigger containers.
A nursery needs shelter from strong elements like sun and wind. Morning sun is milder, and the growing plants do need about eight hours of light a day, so a situation on the east side of your house is good, or against your garden’s west wall, protected from the scorching afternoon sun.
 Josh and Imraan simplify food self sufficiency
How to grow your own food
on a balcony !
If all you have is a balcony there is no need to give up. Propagate plants on your window sills, and focus on green and vitamin rich vegetables and herbs, buying in the staple foods as before. This alone can hugely improve your diet. Add a few dwarf fruiting tree or vine varieties and you can turn your balcony into a real oasis.
The hands on aspects of
how to grow plants for
small plant nurseries
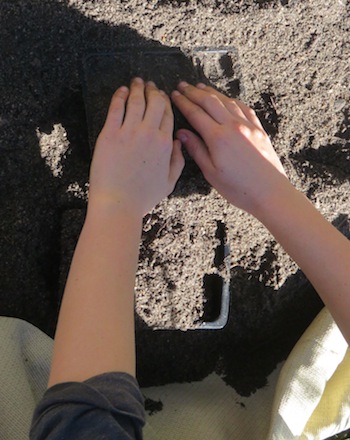 trays for propagating plants prepared with a light hand
Preparing the soil and trays
After this introduction, the very instructive hands on activity followed. We learned about the different mixes for seed germination and cuttings. The seeds need a soil which holds slightly more moisture, to germinate, and slightly more nutrition for the growing plant, without an excess which encourages pathogens. The cuttings need a much lighter soil with good drainage in order not to rot, as they spend a long time in that soil. For these mixes use river sand and sifted compost 1:3 for seeds and 3:1 for cuttings.
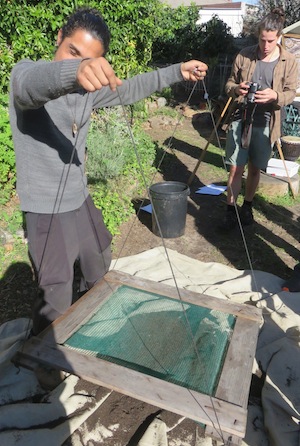 Imraan added sieve hangers for when he's working alone
We sifted compost in a fine sieve kitted out with hangers so that it can be used by a single person easily, but we worked together on the sifting. It is necessary as large bits of material are still decomposing and carry pathogens. The sand and compost for the two mixes were carefully measured out and two handfulls of rock ash and four of bonemeal were added to forty litres of seedling mix . You can also add 10% vermicompost as it contains fungicidal microorganisms and many nutrients. This was all blended together by a rolling action in a tarp, in a nice concerted effort by the group.
Next, the propagation trays were cleaned in a 1:6 vinegar water mix to diinfect them, and then rinsed with water. Then they were filled with the right mix.
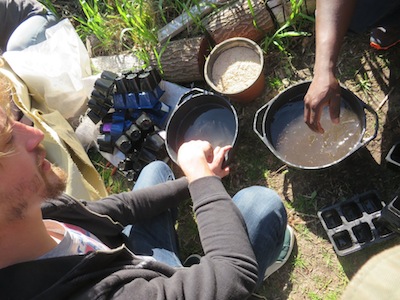 Rinsing the plant propagation trays in vinegar water
Sowing seeds
Josh explained more about seed sowing to us. It is actually very simple and I don’t know why I have found it intimidating for so long. Probably frequent failure. My mistake is watering irregularly. Seeds need not to dry out till they have germinated. Some difficult seeds can be encouraged to germinate, depending on type, with soaking, smoking, or placing the containers in a large clear plastic bag for stable 100% humidity. This covering can also help cuttings, but it does encourage fungus. I’ve found plastic covers and soaking very effective with chili seeds.
We were given some names of seed suppliers of the unusual heirloom and permaculture favourites.
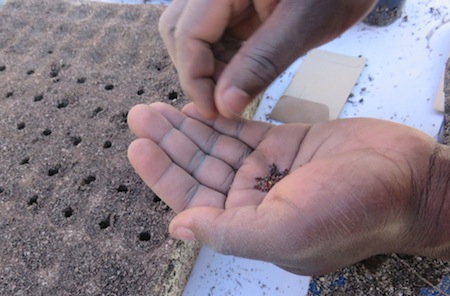
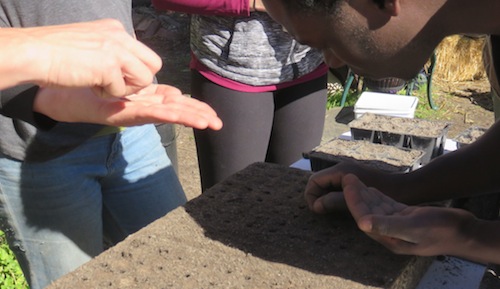 Carefully sowing the seeds singly in prepared holes
Josh places seed at a sowing depth of 2-3 times the size. I’ve learned to sow more shallow. It all works with the right care, and loose soft soil. To keep up supply to the food garden, sow vegetables at least once month. You can sow a single seed of the cabbage family (Crucifereae) and rocket as they germinate easily, and two seeds from plants in the tomato family (Solanaceae). Make your holes, drop in the seed and close the hole with a gentle pressure of the finger. That’s it. Really…so simple !
Taking cuttings
Next up we planted the cuttings in a tray prepped by Imraan containing the light soil mix. He uses effective micro-organisms for cuttings, which have many other uses in permaculture plant nurseries. This inoculates the cutting with good micro organisms which prevent the pathogens from taking over. Just dip them in the brew and plant them. Josh and Imraan run workshops teaching you to make your own effective micro organisms or EM’s.
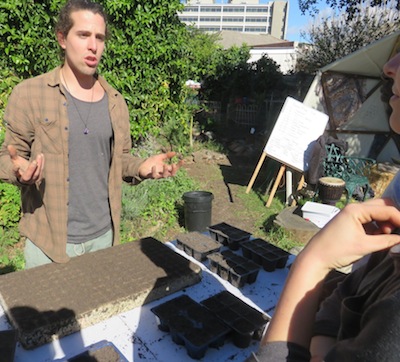 Josh explains some benefits of effective micro organisms
Cuttings should never be allowed to wilt. They should be done immediately or kept in the fridge. If the leaves transpire they suck air into the vascular system at the wound which is a bad thing.
We learned how to do hard, semi and soft wood cuttings. Take 15-30 cm hard wood cuttings in autumn and deciduous wood cuttings in spring. Cut at 45 degees just below a node, insert them 1/3 into soil and place them in the shade. Water once a week and check after three months. Semi hardwood cuttings are soft at the top and hard at the bottom. Take 7-12 cm cuttings, tearing off a tail of bark at the bottom called a heal. Cut back all but 3-6 leaves. Dip in honey, willow-water or EM’s to do it the natural way. Water semi hard cuttings ever two days. Soft cuttings can be taken in late winter as they dessicate easily and our winter is wet. Keep these cuttings separate from the others and water them more.
 Imraan prepares a tray with the sandy cutting mix
Layering
After this we learned some other methods of propagation such as ground layering which consists in deleafing some of the stem of any lanky shrub branch, and then burying and weighting it. Air layering requires removing the bark on a pencil to finger thick tree branch, and then holding a growing medium like damp sawdust or peat moss over the cut with a bag or some aluminium foil. These methods are slow but have high success rates.
Propagating plants from roots
We learned about division which is just breaking up a clumping plant, and root cutting which is cutting up the roots of a plant into finger length pieces, and burying it in cutting mix. The success of these methods depends very much on the plant, and whether it is easily propagated in this way.
Propagating plants by seed or by cloning (the other methods) ?
For those plants which propagate well from seed, save seed in ash or in the fridge. You will need about a thousand seeds of a particular fruit tree to get a really good bearer for future cuttings. This is why most plant nurseries mass propagate fruit trees from cuttings. These cloned forms have the cell memory of old plants, like the ones they were cut from. They bear sooner. But occasional seed propagation is needed to rejuvenate the tissues and for genetic diversity.
 books, google, training, but mainly hands on experience are what make you a horticulturist
Some typical preparation when starting small plant nurseries
So you are ready to start your own nursery. To save yourself agonies and lost time, do some plant research on individual plants and how they grow best, and visit a workshop or two on propagation for the kind of rich information and hands on experience you will probably not find in books or on the internet. The rest you will learn as you go. Keep getting more input from time to time from experienced people like Josh and Imraan, and your skill will keep developing. Today I received the post-workshop email from them with four downloads on plant propagation.
Good luck, keep at it, and don’t be dismayed by plant loss. All nurseries take heavy losses at all stages of growth. Its part of the territory. You are not alone.
------
home page for more links on natural home gardening
------
Natural garden design and ways of getting there
------
A collection if pictures from my little home nursery
------
You’re a home gardener ! Share your experiences and questions !
We all know about home gardening. Tell us about your successes, challenges and ask about issues that bother you. You may have the luxury of a back garden, but there are other ways we learn. Few people age without growing something or buying vegetables during their lives ! It is absolutely guaranteed that you have learned things which can help others on their gardening journey.
We invite you to share your stories, ask questions, because if a thing has bothered you it will bother others too. Someone may have a solution ! No question is too small. There is learning for everyone involved, for you, for me (yes, I learn from every question), for us all. Exciting stuff !
We are starting on a new journey. Every week we will profile your letters ! The best stories and questions we receive.
What Other Visitors Have Said
Click below to see contributions from other visitors to this page...
Milk sachet nursery - Germinating seeds in old milk sachets 


Hello and thank you for sharing your experiences about home gardening on your website.
You inspired me to combine recycling with gardening at home and …
Restore Nature Newsletter
I've been writing for four years now and I would love to hear from you
Please let me know if you have any questions, comments or stories to share on gardening, permaculture, regenerative agriculture, food forests, natural gardening, do nothing gardening, observations about pests and diseases, foraging, dealing with and using weeds constructively, composting and going offgrid.
SEARCH
Order the Kindle E-book for the SPECIAL PRICE of only
Prices valid till 30.09.2023
Recent Articles
-
garden for life is a blog about saving the earth one garden at a time
Apr 18, 25 01:18 PM
The garden for life blog has short articles on gardening for biodiversity with native plants and regenerating soil for climate amelioration and nutritious food -
Cape Flats Sand Fynbos, Cape Town's most endangered native vegetation!
Apr 18, 25 10:36 AM
Cape Flats Sand Fynbos, a vegetation type found in the super diverse Cape Fynbos region is threatened by Cape Town's urban development and invasive alien plants -
Geography Research Task
Jan 31, 25 11:37 PM
To whom it may concern My name is Tanyaradzwa Madziwa and I am a matric student at Springfield Convent School. As part of our geography syllabus for this
"How to start a profitable worm business on a shoestring budget
Order a printed copy from "Amazon" at the SPECIAL PRICE of only
or a digital version from the "Kindle" store at the SPECIAL PRICE of only
Prices valid till 30.09.2023

