Dear Reader, in this age of AI created content, please support with your goodwill someone who works harder to provide the human-made. Sign up at the top of the lefthand column or bottom of this page. You will receive my hand illustrated monthly newsletter RESTORE NATURE and access to the biodiversity garden design course as I write...and nothing else, I respect your time. I am also removing the advertizing as best I can as its become intrusive inappropriate and pays me nothing.
sun loving aloes planted in a raised bed
Restore Nature Newsletter
I've been writing for four years now and I would love to hear from you
Please let me know if you have any questions, comments or stories to share on gardening, permaculture, regenerative agriculture, food forests, natural gardening, do nothing gardening, observations about pests and diseases, foraging, dealing with and using weeds constructively, composting and going offgrid.
Stage 3
backyard garden design project
starting with planting
14th february 2016
Moving aloes to the raised bed
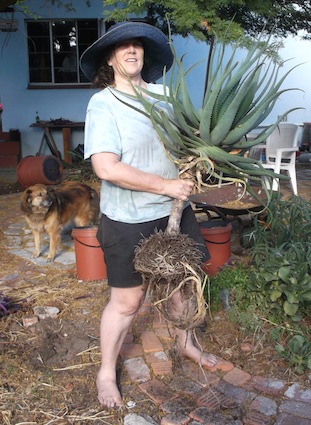
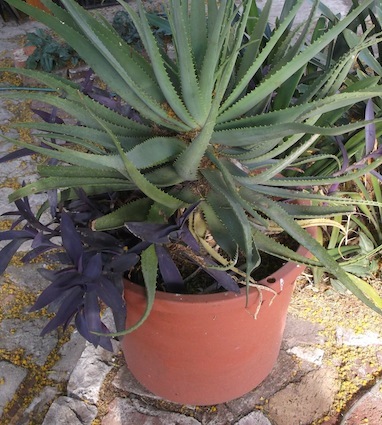
I planned to transplant the aloes into the raised bed, during stage two of the backyard garden design project, the final plan for planting. On the evening of 14th February, after a long day of writing, it was coolish and ideal weather for gardening. I had to transplant the aloes from two big pots under the acacia tree.
They like sun and although they appear to be thriving in the shade, I want to move them to make way for the philodendrons. I chose to plant them in our raised bed, surrounded by a dry stone retaining wall, because it is against the garden wall, which is very high at that point, traps the sun, baking in summer, and warm all winter.
How the raised bed was built, and rebuilt
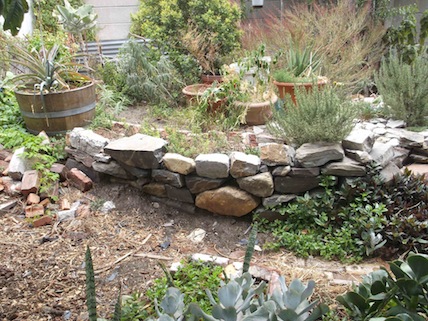
The raised bed was built fifteen years ago to take the sand when we dug the deep pond which you will see labeled as ‘chill pit’ in the design. I found the stone in a rubbish pile when a Victorian building in our area was being demolished. I dragged it home in our trailer. Large solid stone blocks are heavy and the trailer could only take one layer at a time and slow driving. I cannot lift most of the blocks myself so the wall was built with my partner’s help. The garden was a farm for many years and people clambering over the wall to reach the worm beds, slowly trod them into the ground and the raised bed collapsed. A year ago we rebuilt most of it and made the steps you see in the photographs, and planted herbs along the perimeter and the big wild bush with the red foliage.
We stacked the big flat sided slate rocks flat side against flat side, making a pile that was narrower at the top, and slowly tending inwards. We stuffed the gaps in the stone with plastic bags from the back, and brown carpet wool from the front, where the plastic was visible. Otherwise the sand just pours out of the gaps when you water plants near the edge of the wall. Another reason I chose the raised bed for planting aloes is that I have lost aloes due to rot in our extended rainy winters, and the raised bed is consistently dry, as it has very good drainage. Now it is time to use the sunshine for sun-loving plants, without planting them so they cast shadow on the vegetable garden in the middle of the raised bed. The raised bed used to be separate from the wall, but in time it became filled up with vermicompost, so the aloes are on top of an ancient worm bed.
------
The transplanting process
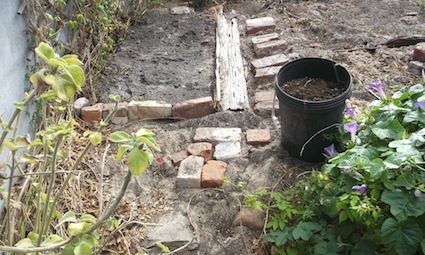
I prepared the bed against the garden wall by outlining the area with an old log and some bricks to level it and prevent runoff. Our sand in this region repels water like oil due to ancient fire residues and dried plant oils coat all the grains, so preventing runoff is more important than usual.
I surrounded the bed with stepping stones
I leveled and watered the sand
I dressed it with 2 cm of vermicomost
I watered the vermicompost
I then began to dig at the aloe in the pot but it would not budge.
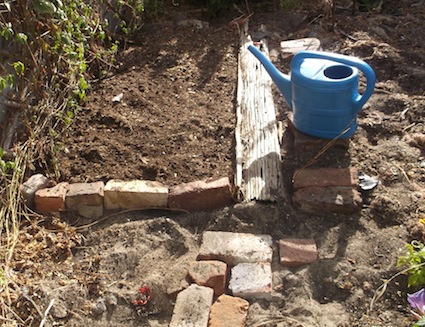
A rapid adjustment to the planting plan
I dug out the purple wandering jew which was its pot companion, and did well and looked lovely with the purple and grey contrast. I had not intended to transplant the purple one yet. So I quickly had to refer back to my planting plan and hastily dug a hole popped the large root mass of the purple plant in it, chopped off the long shoots and kept them for making cuttings. After a long struggle with the aloe, I tipped the pot over to find the aloe had formed a tough circle of roots in the bottom of the pot.
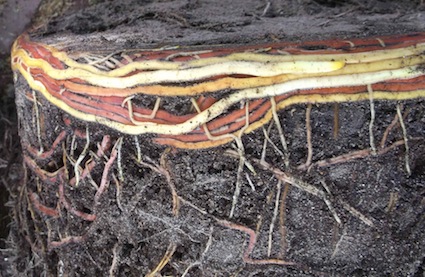
I left it lying there and dug a huge hole in the new bed, planted the aloe, stamped the soil back and watered it again.
Another adjustment and a replanned bed
It was bigger than I thought and the bed would not be large enough for the second aloe, so I had to replan on the go.
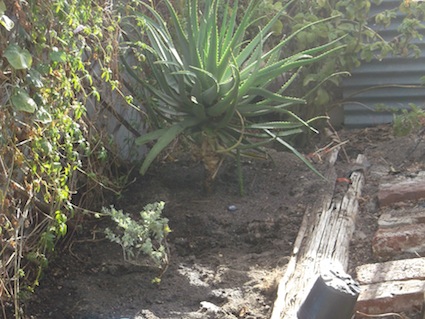
I planted the Salvia lutea beside the aloe as intended and then sought a new place for the other aloe, still in the pot.
More hasty adjustments and more battles
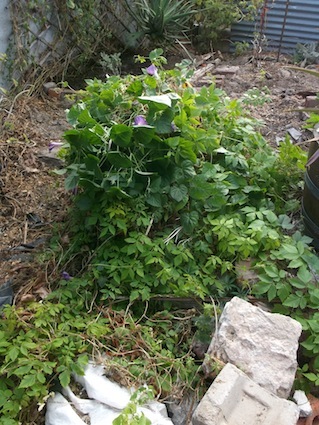
I determined that a mat of creepers nearby could be removed to create a spot on the edge of the stone dry wall of the raised bed which would be perfect.
I sawed off the huge morning glory root with the bow saw and then began to roll the mass away like a snowball, pulling up roots that anchored it as I rolled it. Eventually I had to fetch the wheelbarrow, over which it towered, knocking over a pot as we went towards the trailer which will take it to the dump. I don’t want to compost it, the morning glory will just resurrect itself. I have to do something about the stump left in the ground, but by then I was exhausted and the light was fading, and I decided to call it a day. I righted the fallen pot, spaded the fallen soil back into it, swept it up and cleared the area of soil, and took my tool indoors.
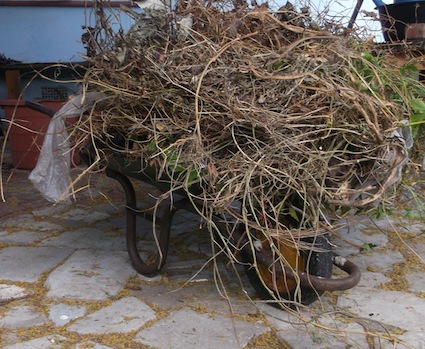
A satisfying day of gardening draws to a close
I looked forward to a nice hot cup of tea, and whatever it was that was putting out those perfumes from Stephan’s kitchen. I’ve finally persuaded him to do a cooking blog, but it will be months in the making and he’s got major disruptions coming up that will slow it down. However, we have started photographing our supper every day now. These are the trials and tribulations of cohabiting with a gourmet.
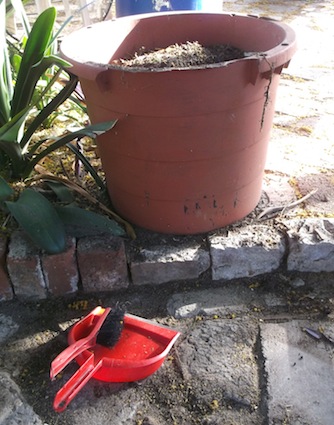
Garden hand tools and materials used
spade
trowel
dustpan and handbroom
bucket
vermicompost
watering can
fish water
bow saw
clippers
wheelbarrow
one huge grown on aloe and purple ground cover
all tools from my local supermarket, hardware store and garden supply store, vermicompost, fishwater and plants were produced in the garden.
------
home page with links to green homes, recycling and more
------
stage 2 the garden plan for planting
------
stage 1 the determination of your layout and givens
------
stage 4 planting out the second aloe pot
SEARCH
Order the Kindle E-book for the SPECIAL PRICE of only
Prices valid till 30.09.2023
Recent Articles
-
garden for life is a blog about saving the earth one garden at a time
Apr 18, 25 01:18 PM
The garden for life blog has short articles on gardening for biodiversity with native plants and regenerating soil for climate amelioration and nutritious food -
Cape Flats Sand Fynbos, Cape Town's most endangered native vegetation!
Apr 18, 25 10:36 AM
Cape Flats Sand Fynbos, a vegetation type found in the super diverse Cape Fynbos region is threatened by Cape Town's urban development and invasive alien plants -
Geography Research Task
Jan 31, 25 11:37 PM
To whom it may concern My name is Tanyaradzwa Madziwa and I am a matric student at Springfield Convent School. As part of our geography syllabus for this
"How to start a profitable worm business on a shoestring budget
Order a printed copy from "Amazon" at the SPECIAL PRICE of only
or a digital version from the "Kindle" store at the SPECIAL PRICE of only
Prices valid till 30.09.2023
