Dear Reader, in this age of AI created content, please support with your goodwill someone who works harder to provide the human-made. Sign up at the top of the lefthand column or bottom of this page. You will receive my hand illustrated monthly newsletter RESTORE NATURE and access to the biodiversity garden design course as I write...and nothing else, I respect your time. I am also removing the advertizing as best I can as its become intrusive inappropriate and pays me nothing.
How to grow trees from seed the easy way
Nov 11, 2020.
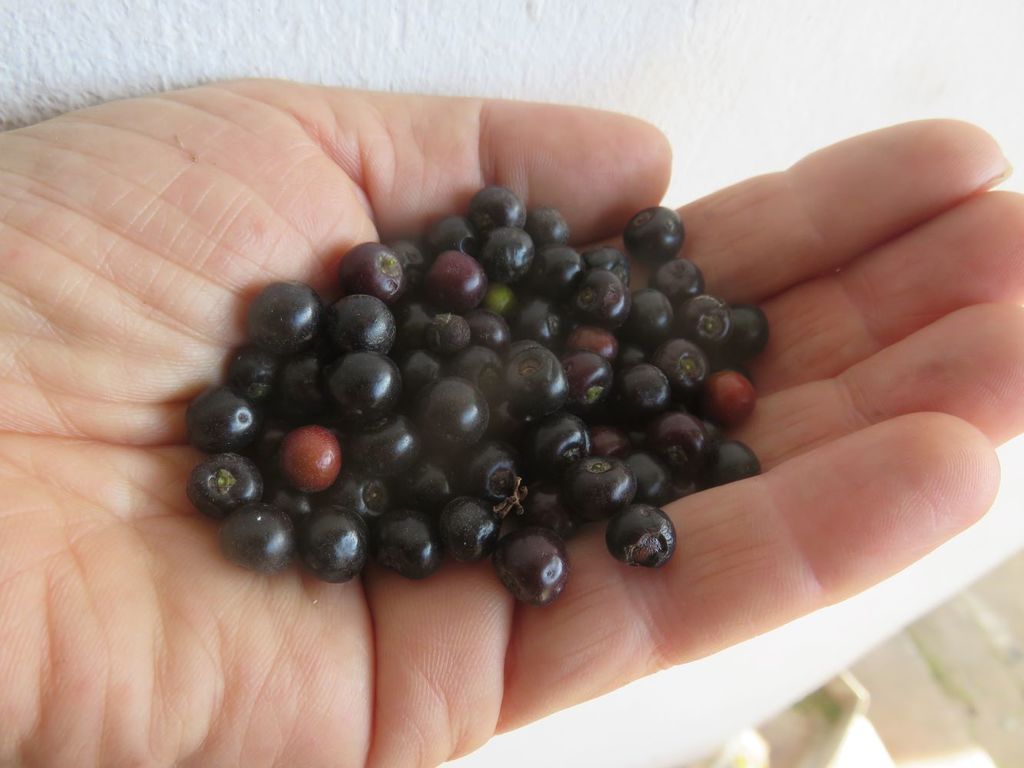 These are the edible fruit of a small native tree, Euclea racemosa.
I spoke about the advantages of growing trees from seed in a recent Greenidiom regenerative gardening blog post. Growing native trees is especially beneficial to urban biodiversity. This was part of series of 12 blog posts on easy to do regenerative gardening activities that can start you off on the regenerative path in your garden, and now I'll explain how I grow trees from seed with lots of pictures and some more detail.
I recommend over sowing. Sow much more than you will
need. Also over plant, planting many more trees than you will need.
This way, if you lose trees you will not grieve too much, and you can
also eliminate male trees if you have too many, which you will not know
till they bloom.
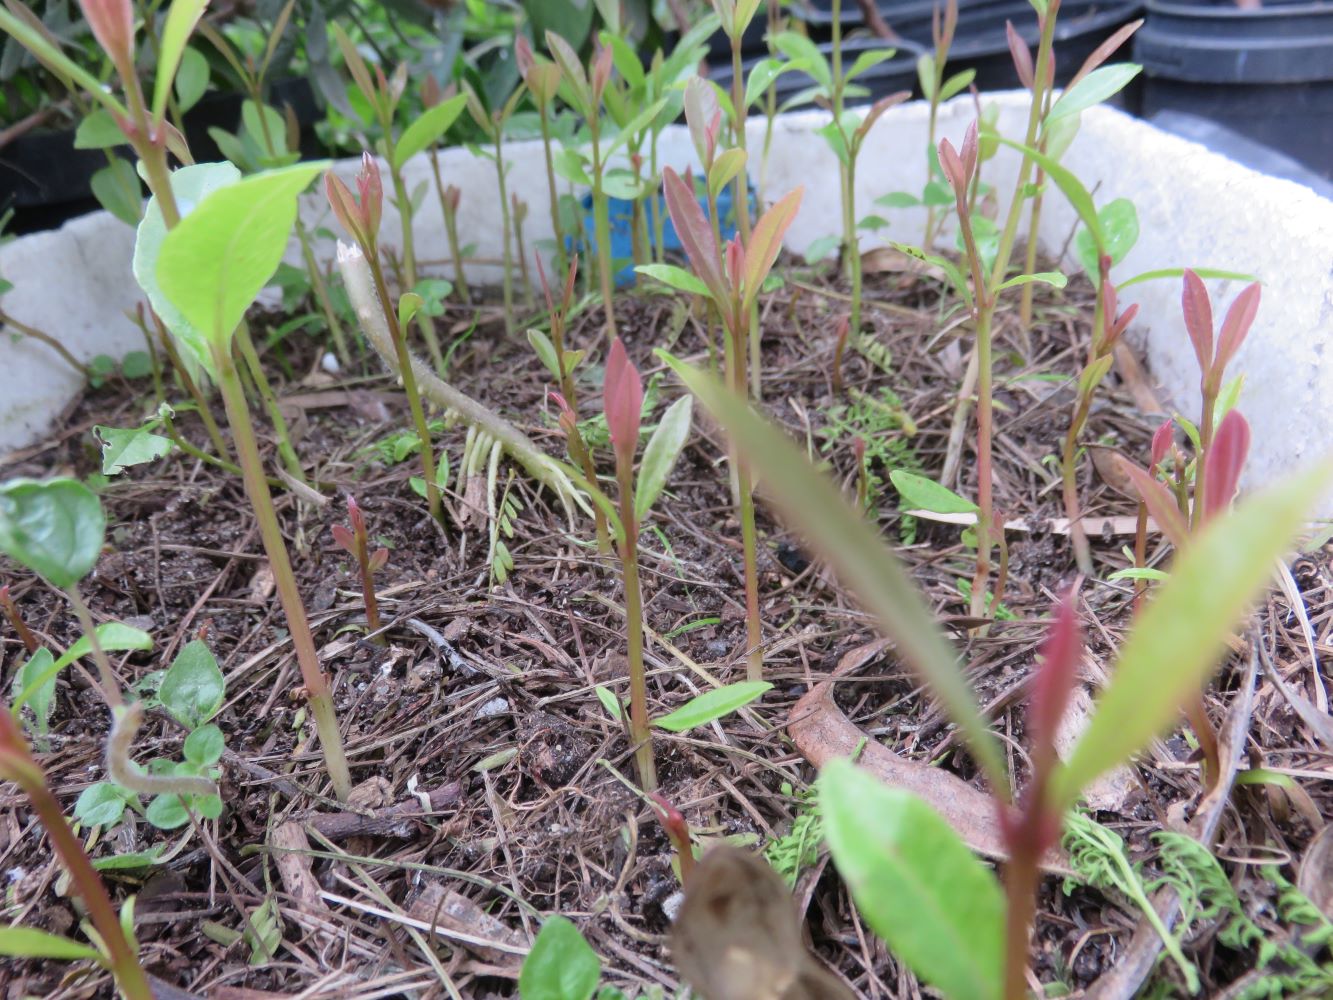 The Euclea racemosa seed came up very well. In the wild they often succumb to a parasite that bored into the seeds.
Gathering the seed
My very basic methods are to collect seed by sweeping it up off the street, or picking it up in parks or in nature areas, taking them from bought fruit, or swapping with other growers. If it has a fruit, its best to clean it up, as the fruit may have a growth retardant or encourage bad molds. Some like to be fermented a little, and that helps get rid of the fruit flesh. Some do not react well to this and its impossible to predict. Experience will tell.
Generally, but not always, the fresher the better. When the seed falls, sow it, that is nature's way. Stale acorns are not much good for example. It is not necessary to dry seed and keeping it in bags before sowing. That is only necessary for seed trading, and to preserve seed to withstand seasons of no growth. Reduction in viability is assumed with storage.
Growing the trees
Clean
the seed of excess fruit and lay them on about two inches of soil in a
seed tray. Cover with soil the depth of the longest length of the seed.
Water regularly but not too much. You are trying to create constant
stable moisture in the soil, which favors germination, but also they
must not be too wet as seedlings tend to succumb to fungi. Mix plenty of
vermicast into the soil to help combat fungi and hold water and stabilize the moisture content.
For seed trays I use recycled fish trays made of polystyrene, picked
up for free outside a supermarket. Any deep non biodegradable box or
tray will do, I scatter the seed on the surface of 2 inches or 10 cm of
soil, and cover with more soil as deep as the seed's length.
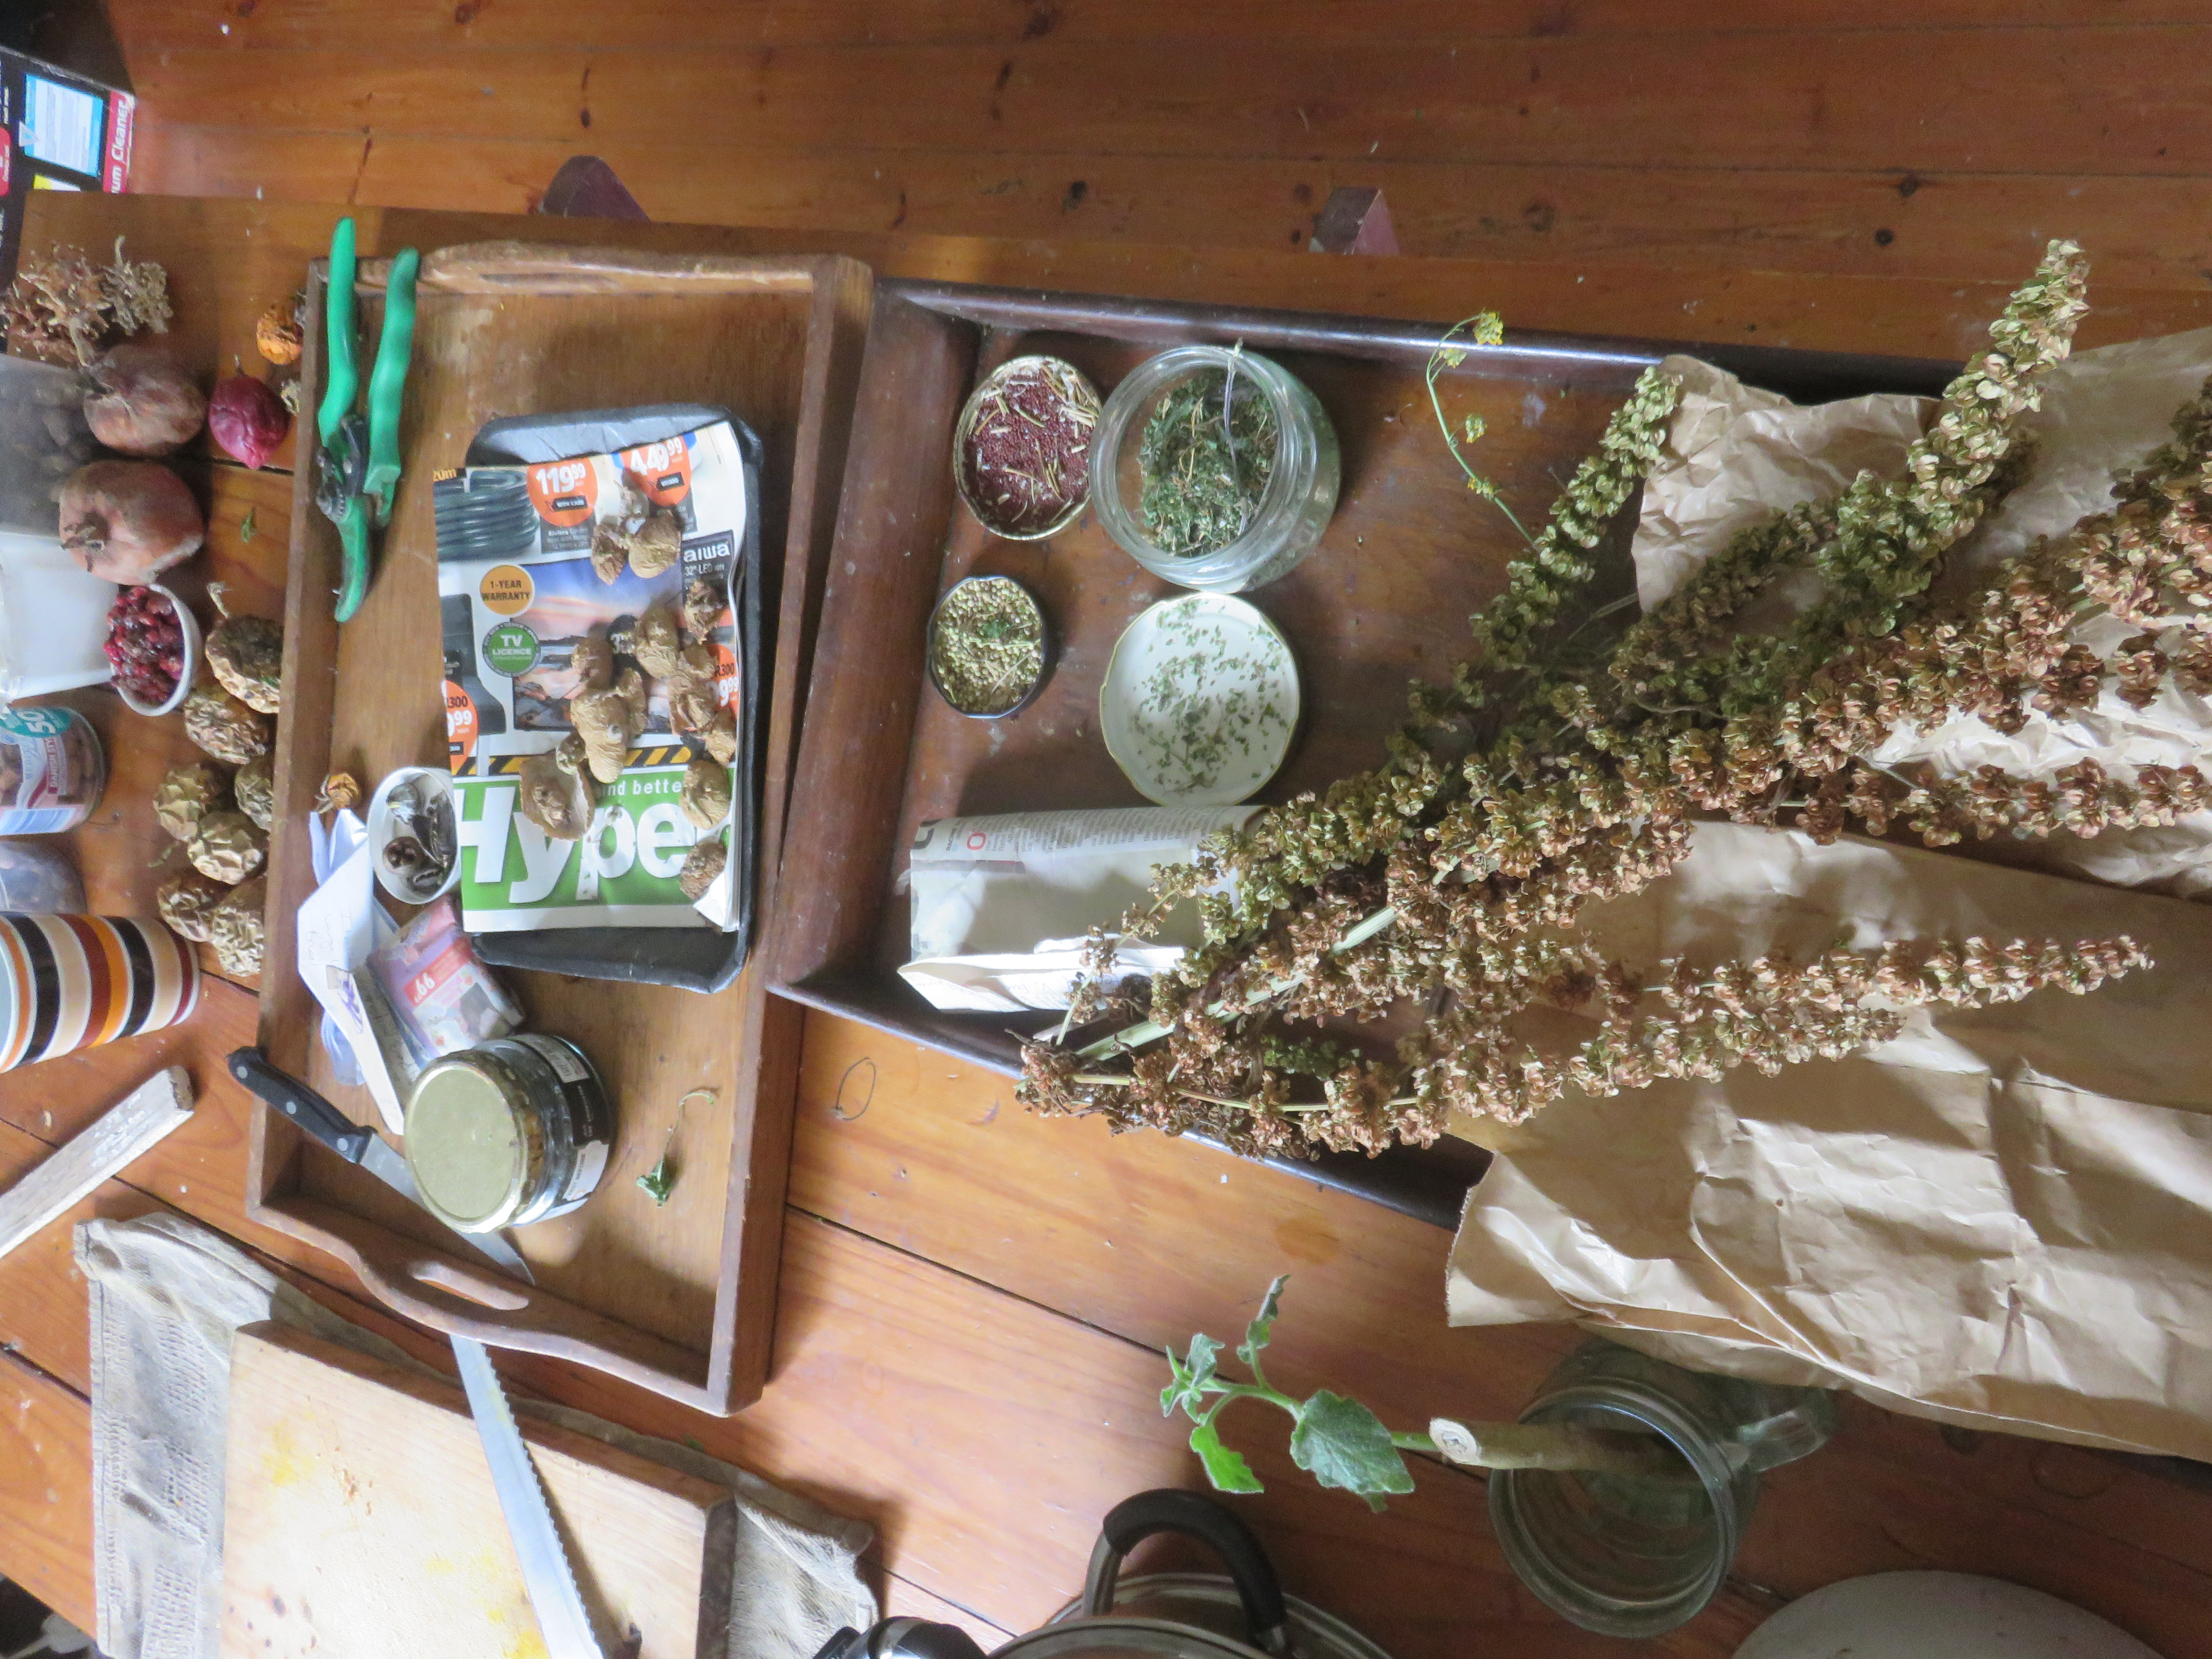 Sorting my wild gathered seeds into cover crop seeds in the foreground and trees at the back.
I've found that big tree seeds just will not germinate in tiny six pack containers. Seeds are very intelligent, and they know there isn't room. The moisture levels are less stable in tiny containers and may message the seed to wait for better times.
Then the watering and waiting starts. It can take months. When you have some seedlings emerging, wait till they have 4-6 leaves and transplant into single containers post haste, or some of them will grow long tap roots and get damaged on transplanting. The tap roots of an oak go right out of the container at the bottom before it has 6 leaves so speed is needed, unless you want them to be stunted, which I do. My garden is too small for forest giants.
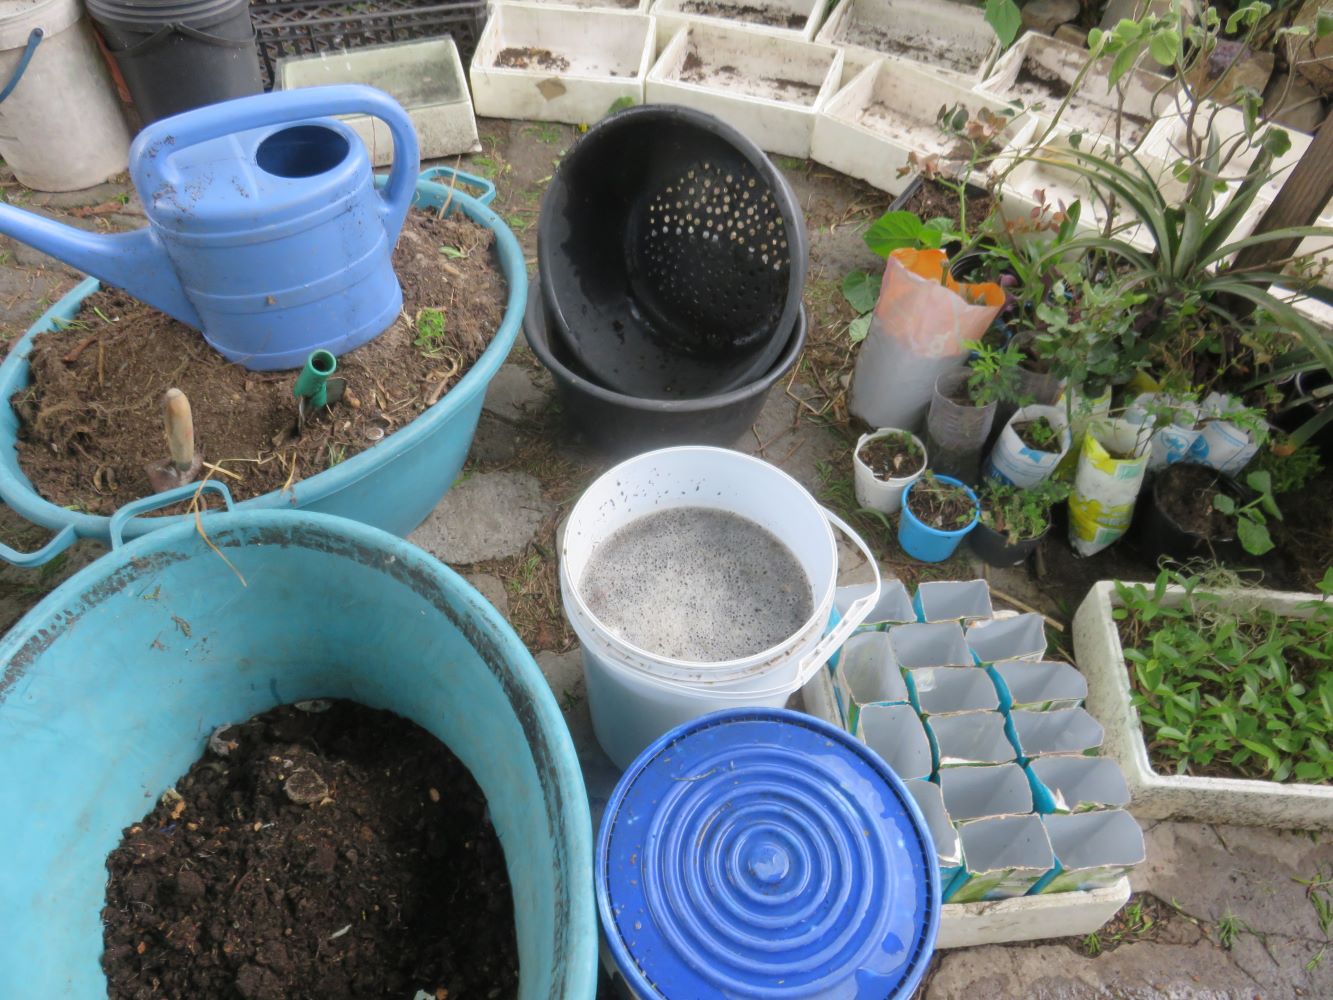 A sieve for separating the biochar from the liquid, buckets of ferments and vermicast.
I had to bulk process the trans planting of the seedlings from the tray into individual containers, as so many had germinated. I tried an experiment. This is not yet proven successful, and is by no means necessary when planting up. To insure diverse microbial life in the potting soil I added about a third vermicompost which has a very good diversity from the worm's gut, smelly fermented compost tea, and some biochar which had charged in fermented urine for months. This biochar smelled mildly of old hay. The ammonia had long since evaporated. I am hoping that rather than by killing microbes with heat and bleach, I can supply healthy soil by promoting microbial diversity and microbial competition.
Into this mix I transplanted nearly a hundred native tree seedlings. You can see all the equipment I needed for the transplanting: the buckets of plant brew, trays of planters, the polystyrene fish boxes I use for seed trays and for holding planters, and the big tubs for mixing the potting soil. I had quite a workout.
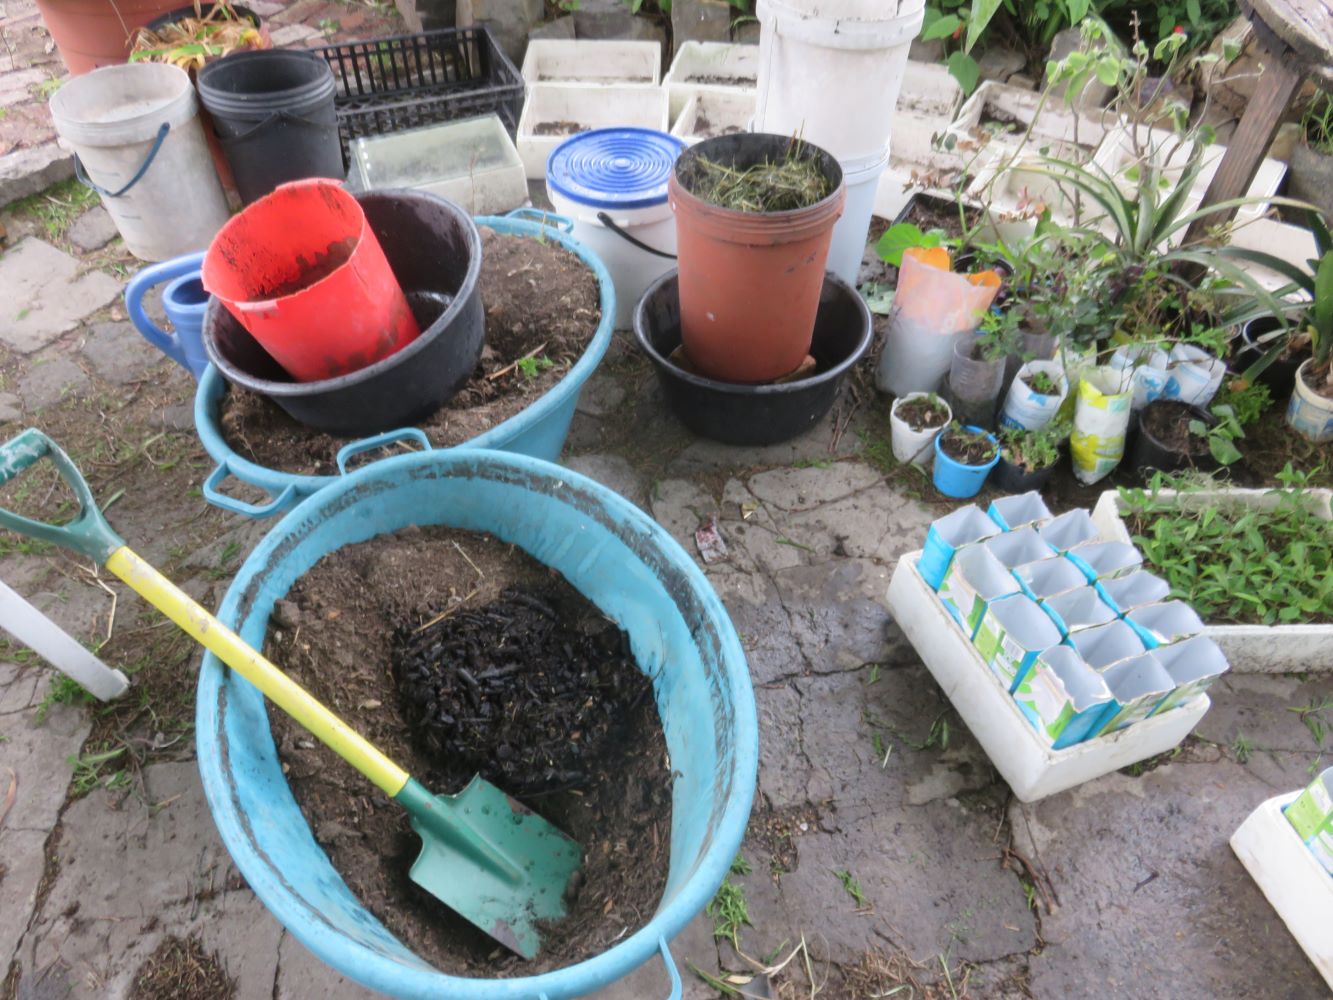 Potting soil, additives, planters and trays.
I used milk cartons, as they also have good bacteria in the form of Lactobacillus which is known to combat some pathogenic plant fungi. I also had a lot of them available as using preserved carton milk is one way I've avoided having to shop often during the pandemic. So I cut off the bottoms, and the nasty little spiky plastic mouths and turned them upside down. I reckon the holes where the mouths used to be will make nice drainage holes.
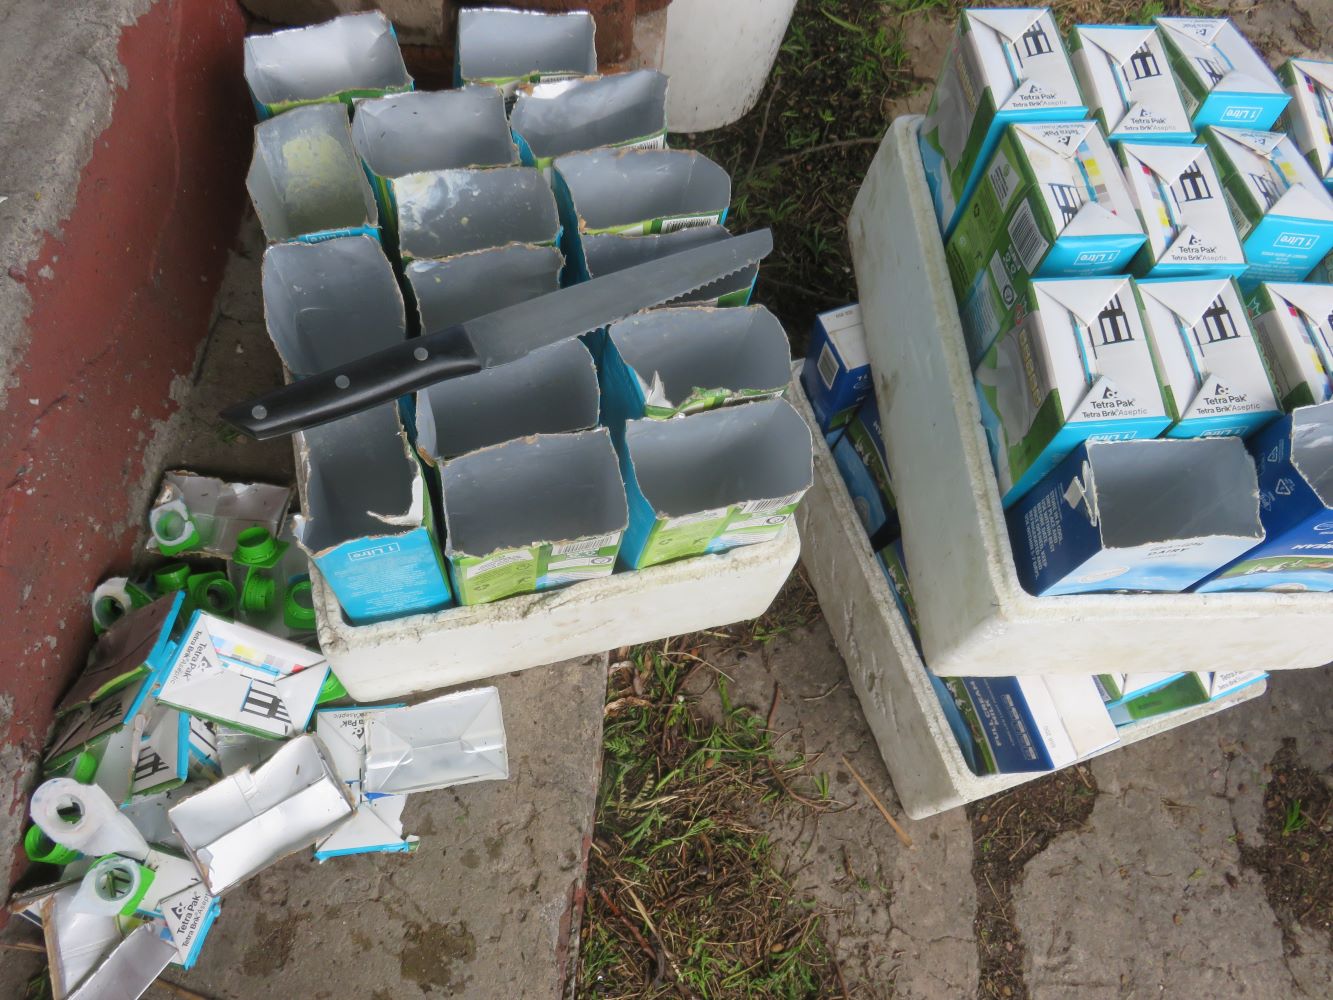 De-capping the milk cartons. They have a waxed cardboard exterior and a plastic and foil lining.
The cartons are kept in poly trays to facilitate shifting them around in bulk. I keep the plant trays light always, to avoid getting back problems. Soil is shoveled over the poly tray till the cartons are full, and then they are moved to a new poly tray and I can tip out all the soil that landed between the cartons.
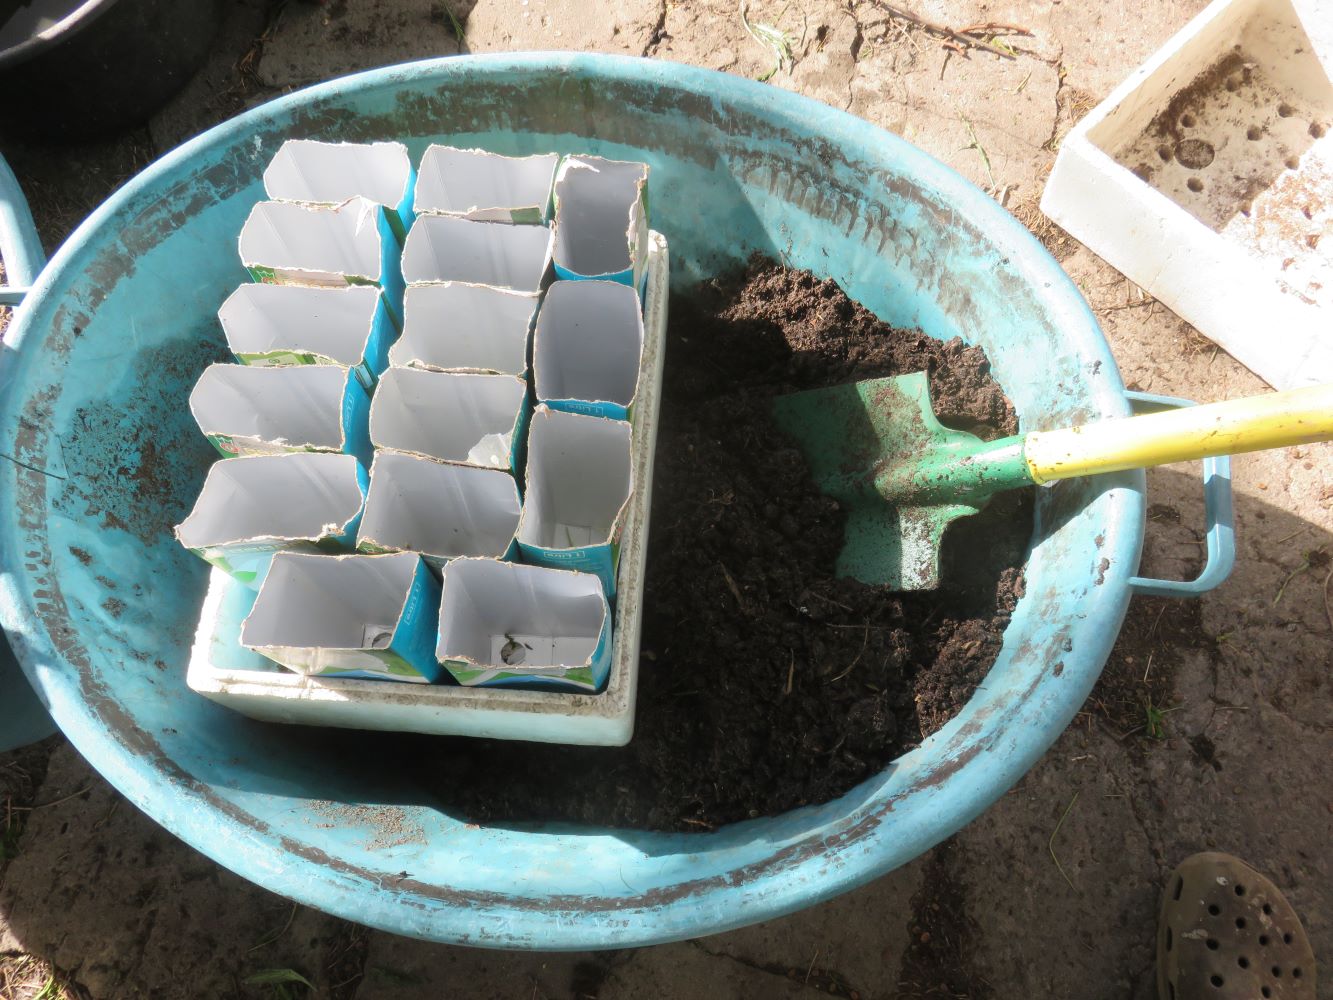 Ready for filling with the spade-fulls of soil. Ready for filling with the spade-fulls of soil. |
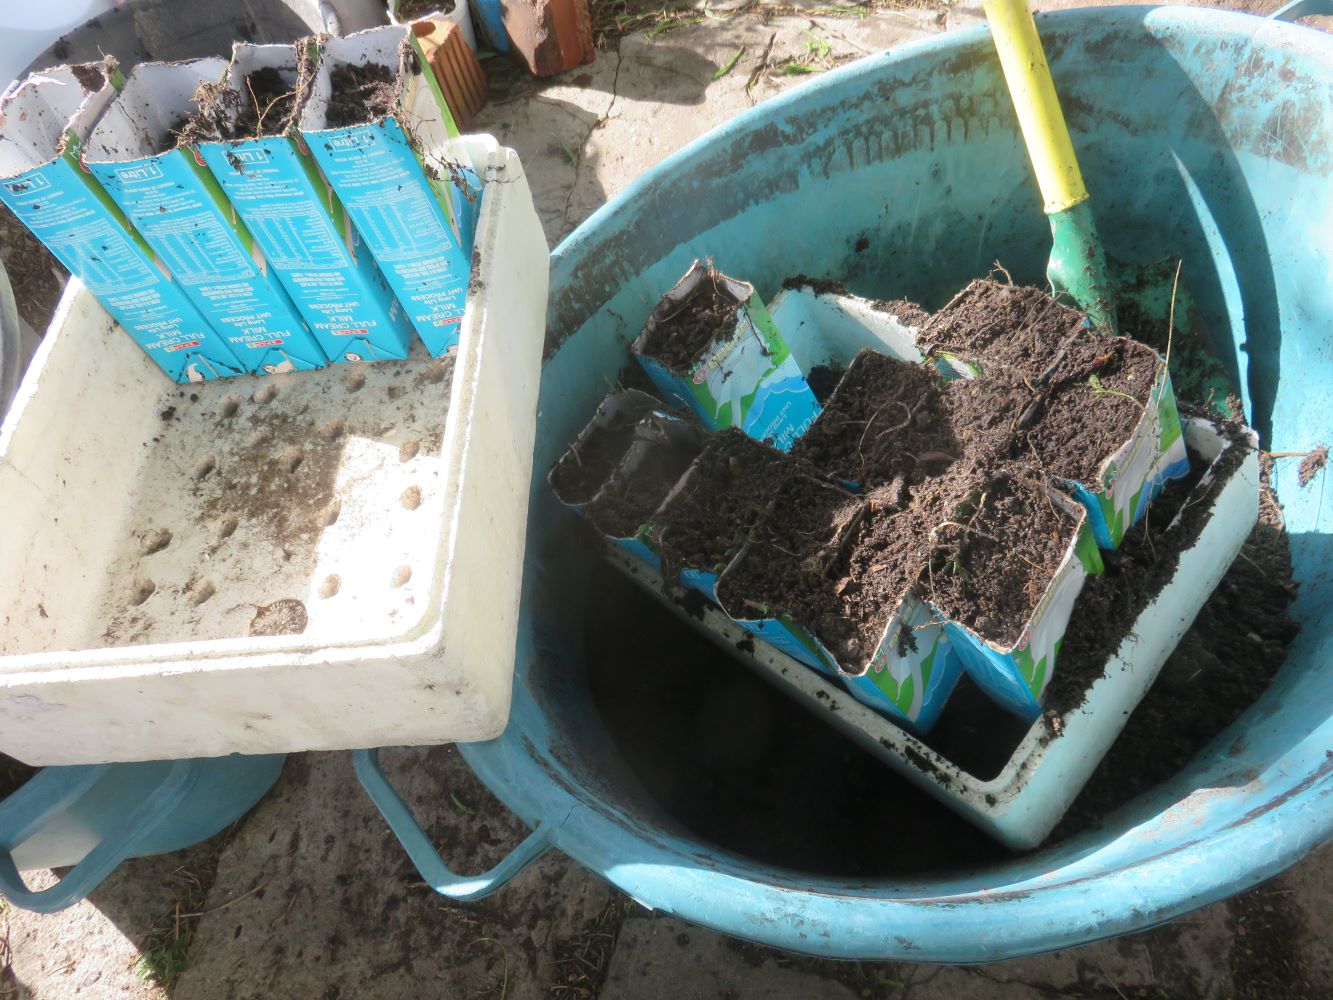 Moving soil filled planters to a clean carton Moving soil filled planters to a clean carton |
Then I water the whole lot at one go and stand the tray of seedlings in some water. It usually helps disentangle the roots better having them so wet. One by one I gently teased out the seedlings' roots and planted one seedling into each milk carton. Normally I would plant two, but these seedlings are very precious. Competition between the twins in a planter often leads to the demise of one of them, so I wanted them all to have a better chance.
It took about four hours to plant up nearly a hundred seedlings, but this means, with the inevitable loss of some of them, that I have enough for two gardens and a pavement planting garden project. It would have taken much longer if I had not resorted to some means of mass production and faster processes.
Don't do this !
To be honest, all my seedlings eventually died. 200 to 0 in the space of a year. I can't just chalk it up to the usual level of mortality in failed garden experiments. I've never had such a horrible outcome except with olive cuttings, which were about 1000 to 1. The Gwarrie or Euclea racemosa were doing fine and then they slowly all yellowed, curled up and died. I have to know why.
Rereading this article it could very well have been the biochar. I never noticed this before and didn't remember I had added it. I tend to see biochar as a magic fertility adding substance but according to a youtube video made by an engineer in the biochar industry, you have to be very careful of the pH which it increases, activated or not, mixed with manures or not. It increases the pH and our soil is naturally already quite calcareous. I'm having second thoughts about putting it in my raised vegetable beds or my taro tub. However my beet and chard in the grey water system don't seem to be suffering from the addition of biochar to their soil. But that was about 5 years ago and just a little !
I also remembered recently that I potted up the Gwarrie with builder's sand. I was told the sand from Philippi was good. Perhaps it wasn't. It may have been contaminated with salt, as its close to the sea, and it may have been contaminated with cement.
So this article is a bit misleading. It wasn't easy growing the Euclea racemosa, although it thrives from here to the middle east and is used as a hedge plant in east Africa ! I've had great success with 5 other native food plants (Asparagus lignosis, Dovyalis caffra, Harpephyllum caffrum, Syzigium cordata, Chrysanthemoides monolifera), notably... no biochar or building sand was used in the potting medium for those !
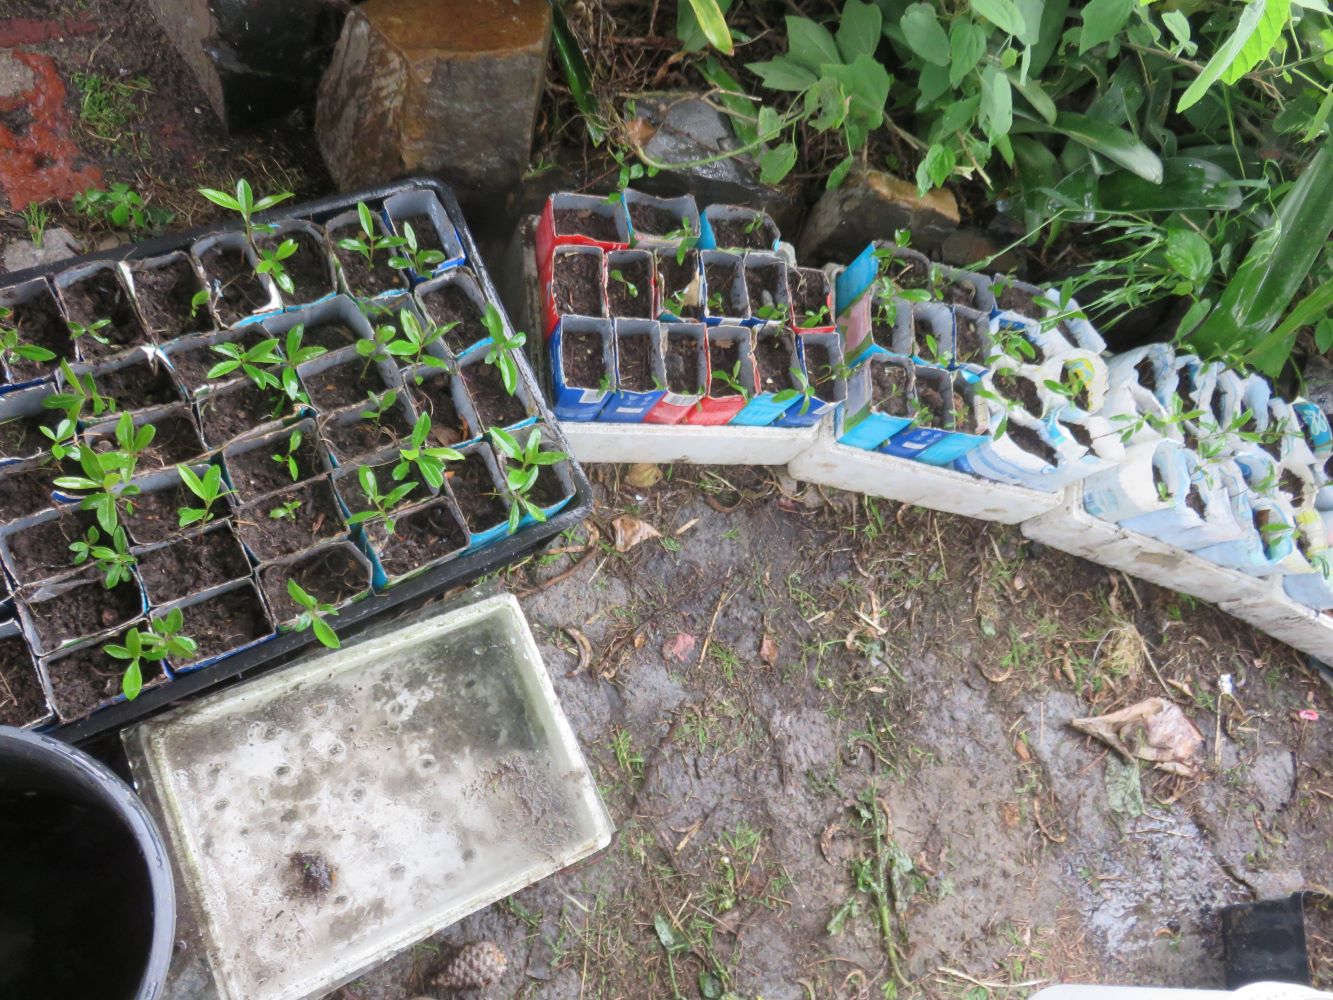 A hundred Euclea racemosa seedlings in individual containers.
------
home page for links to all my topics on regenerative and restorative gardening techniques
------
greenidiom's regenerative gardening blog
------
------
Restore Nature Newsletter
I've been writing for four years now and I would love to hear from you
Please let me know if you have any questions, comments or stories to share on gardening, permaculture, regenerative agriculture, food forests, natural gardening, do nothing gardening, observations about pests and diseases, foraging, dealing with and using weeds constructively, composting and going offgrid.
What Other Visitors Have Said
Click below to see contributions from other visitors to this page...
Euclea racemosa 


I would like to grow E. racemosa here in Australia, but it seems no one grows it in this country, and it has not received approval for import from the …
SEARCH
Order the Kindle E-book for the SPECIAL PRICE of only
Prices valid till 30.09.2023
Recent Articles
-
garden for life is a blog about saving the earth one garden at a time
Apr 18, 25 01:18 PM
The garden for life blog has short articles on gardening for biodiversity with native plants and regenerating soil for climate amelioration and nutritious food -
Cape Flats Sand Fynbos, Cape Town's most endangered native vegetation!
Apr 18, 25 10:36 AM
Cape Flats Sand Fynbos, a vegetation type found in the super diverse Cape Fynbos region is threatened by Cape Town's urban development and invasive alien plants -
Geography Research Task
Jan 31, 25 11:37 PM
To whom it may concern My name is Tanyaradzwa Madziwa and I am a matric student at Springfield Convent School. As part of our geography syllabus for this
"How to start a profitable worm business on a shoestring budget
Order a printed copy from "Amazon" at the SPECIAL PRICE of only
or a digital version from the "Kindle" store at the SPECIAL PRICE of only
Prices valid till 30.09.2023
